> ## Documentation Index
> Fetch the complete documentation index at: https://dripart-docs-nav-cta-ab-test-try-cloud-free.mintlify.site/llms.txt
> Use this file to discover all available pages before exploring further.
# ComfyUI Hunyuan3D-2 示例
> 本文将使用 Hunyuan3D-2 来完成在 ComfyUI 中 3D 资产生成的工作流示例。
# 混元3D 2.0 简介
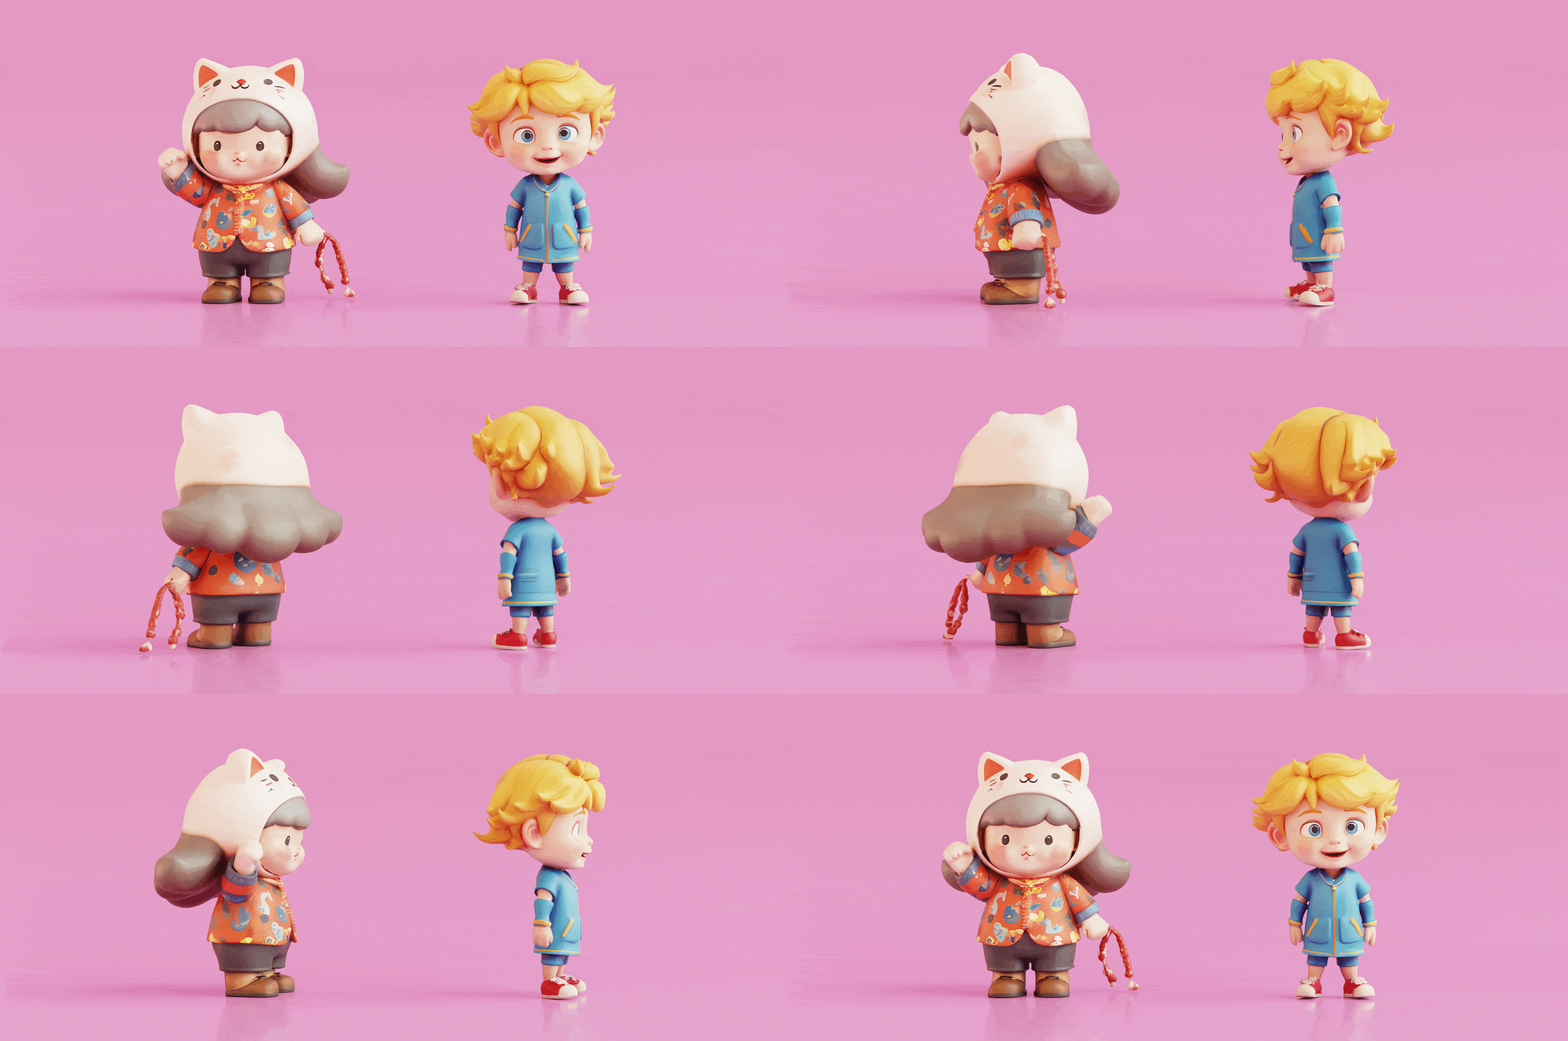

[混元3D 2.0](https://github.com/Tencent/Hunyuan3D-2) 是腾讯推出的开源 3D 资产生成模型,可以通过文本或图像生成带有高分辨率纹理贴图的高保真 3D 模型。
混元3D 2.0 采用两阶段生成方式,首先生成无纹理的几何模型,再合成高分辨率纹理贴图。这有效分离了形状和纹理生成的复杂性。下面是混元3D 2.0 的两个核心组件:
1. **几何生成模型(Hunyuan3D-DiT)**:基于流扩散 Transformer 架构,生成无纹理的几何模型,可精准匹配输入条件。
2. **纹理生成模型(Hunyuan3D-Paint)**:结合几何条件和多视图扩散技术,为模型添加高分辨率纹理,支持 PBR 材质。
**主要优势**
* **高精度生成**:几何结构锐利,纹理色彩丰富,支持 PBR 材质生成,实现接近真实的光影效果。
* **多样化使用方式**:提供代码调用、Blender 插件、Gradio 应用及官网在线体验,适合不同用户需求。
* **轻量化与兼容性**:Hunyuan3D-2mini 模型仅需 5GB 显存,标准版本形状生成需 6GB 显存,完整流程(形状+纹理)仅需 12GB 显存。
近期(2025 年 3 月 18 日),混元3D 2.0 还引入了多视角形状生成模型(Hunyuan3D-2mv),支持从不同角度输入生成更精细的几何结构。
本示例包含三个工作流:
* 使用 Hunyuan3D-2mv 配合多个视图输入生成 3D 模型
* 使用 Hunyuan3D-2mv-turbo 配合多个视图输入生成 3D 模型
* 使用 Hunyuan3D-2 配合单个视图输入生成 3D 模型
目前 ComfyUI 已原生支持 Hunyuan3D-2mv,但暂未支持纹理和材质的生成。请在开始之前确保你已更新到最新版本的 [ComfyUI](https://github.com/Comfy-Org/ComfyUI)。
本教程中的工作流示例 PNG 图像在其元数据中包含工作流 JSON:
* 您可以将它们直接拖入 ComfyUI
* 或者使用菜单 `Workflows` -> `Open (ctrl+o)`
这样可以加载对应的工作流并提示您下载所需的模型。生成的 `.glb` 格式模型将输出至 `ComfyUI/output/mesh` 文件夹。
## ComfyUI Hunyuan3D-2mv 工作流示例
在 Hunyuan3D-2mv 工作流中,我们将使用多视角的图片来生成 3D 模型。注意,多个视角的图片在此工作流中并非必需。你只需使用 `front` 视角的图片即可生成 3D 模型。
请确保你的 ComfyUI 已经更新。
* [ComfyUI 下载](https://www.comfy.org/download)
* [ComfyUI 更新教程](/zh/installation/update_comfyui)
本指南里的工作流可以在[工作流模板](/zh/interface/features/template)中找到。如果找不到,可能是 ComfyUI 没有更新。
如果加载工作流时有节点缺失,可能原因有:
1. 你用的不是最新版(每夜版)。
2. 启动时有些节点导入失败。
* [Cloud](https://cloud.comfy.org) 会在 ComfyUI 稳定版本发布后更新。
所以,如果你发现本文档中有任何核心节点缺失,可能是因为新核心节点尚未在最新稳定版中发布。请等待下一个稳定版发布。
HY 3D 2.0 MV
使用 Hunyuan3D 2.0 MV 从多个视角生成 3D 模型。
 立即在 Comfy Cloud 上运行此工作流
下载 JSON 或在模板库中搜索“HY 3D 2.0 MV”
**输入材料**
将这些文件上传到对应的 `LoadImage` 节点:
`LoadImage` 节点 56 · 前视图
`LoadImage` 节点 78 · 左视图
`LoadImage` 节点 80 · 后视图
`LoadImage` 节点 87 · 右视图
### 1. 工作流
请下载下面的图片,并拖入 ComfyUI 以加载工作流。

下载下面的图片,我们将把它们用作输入图像。
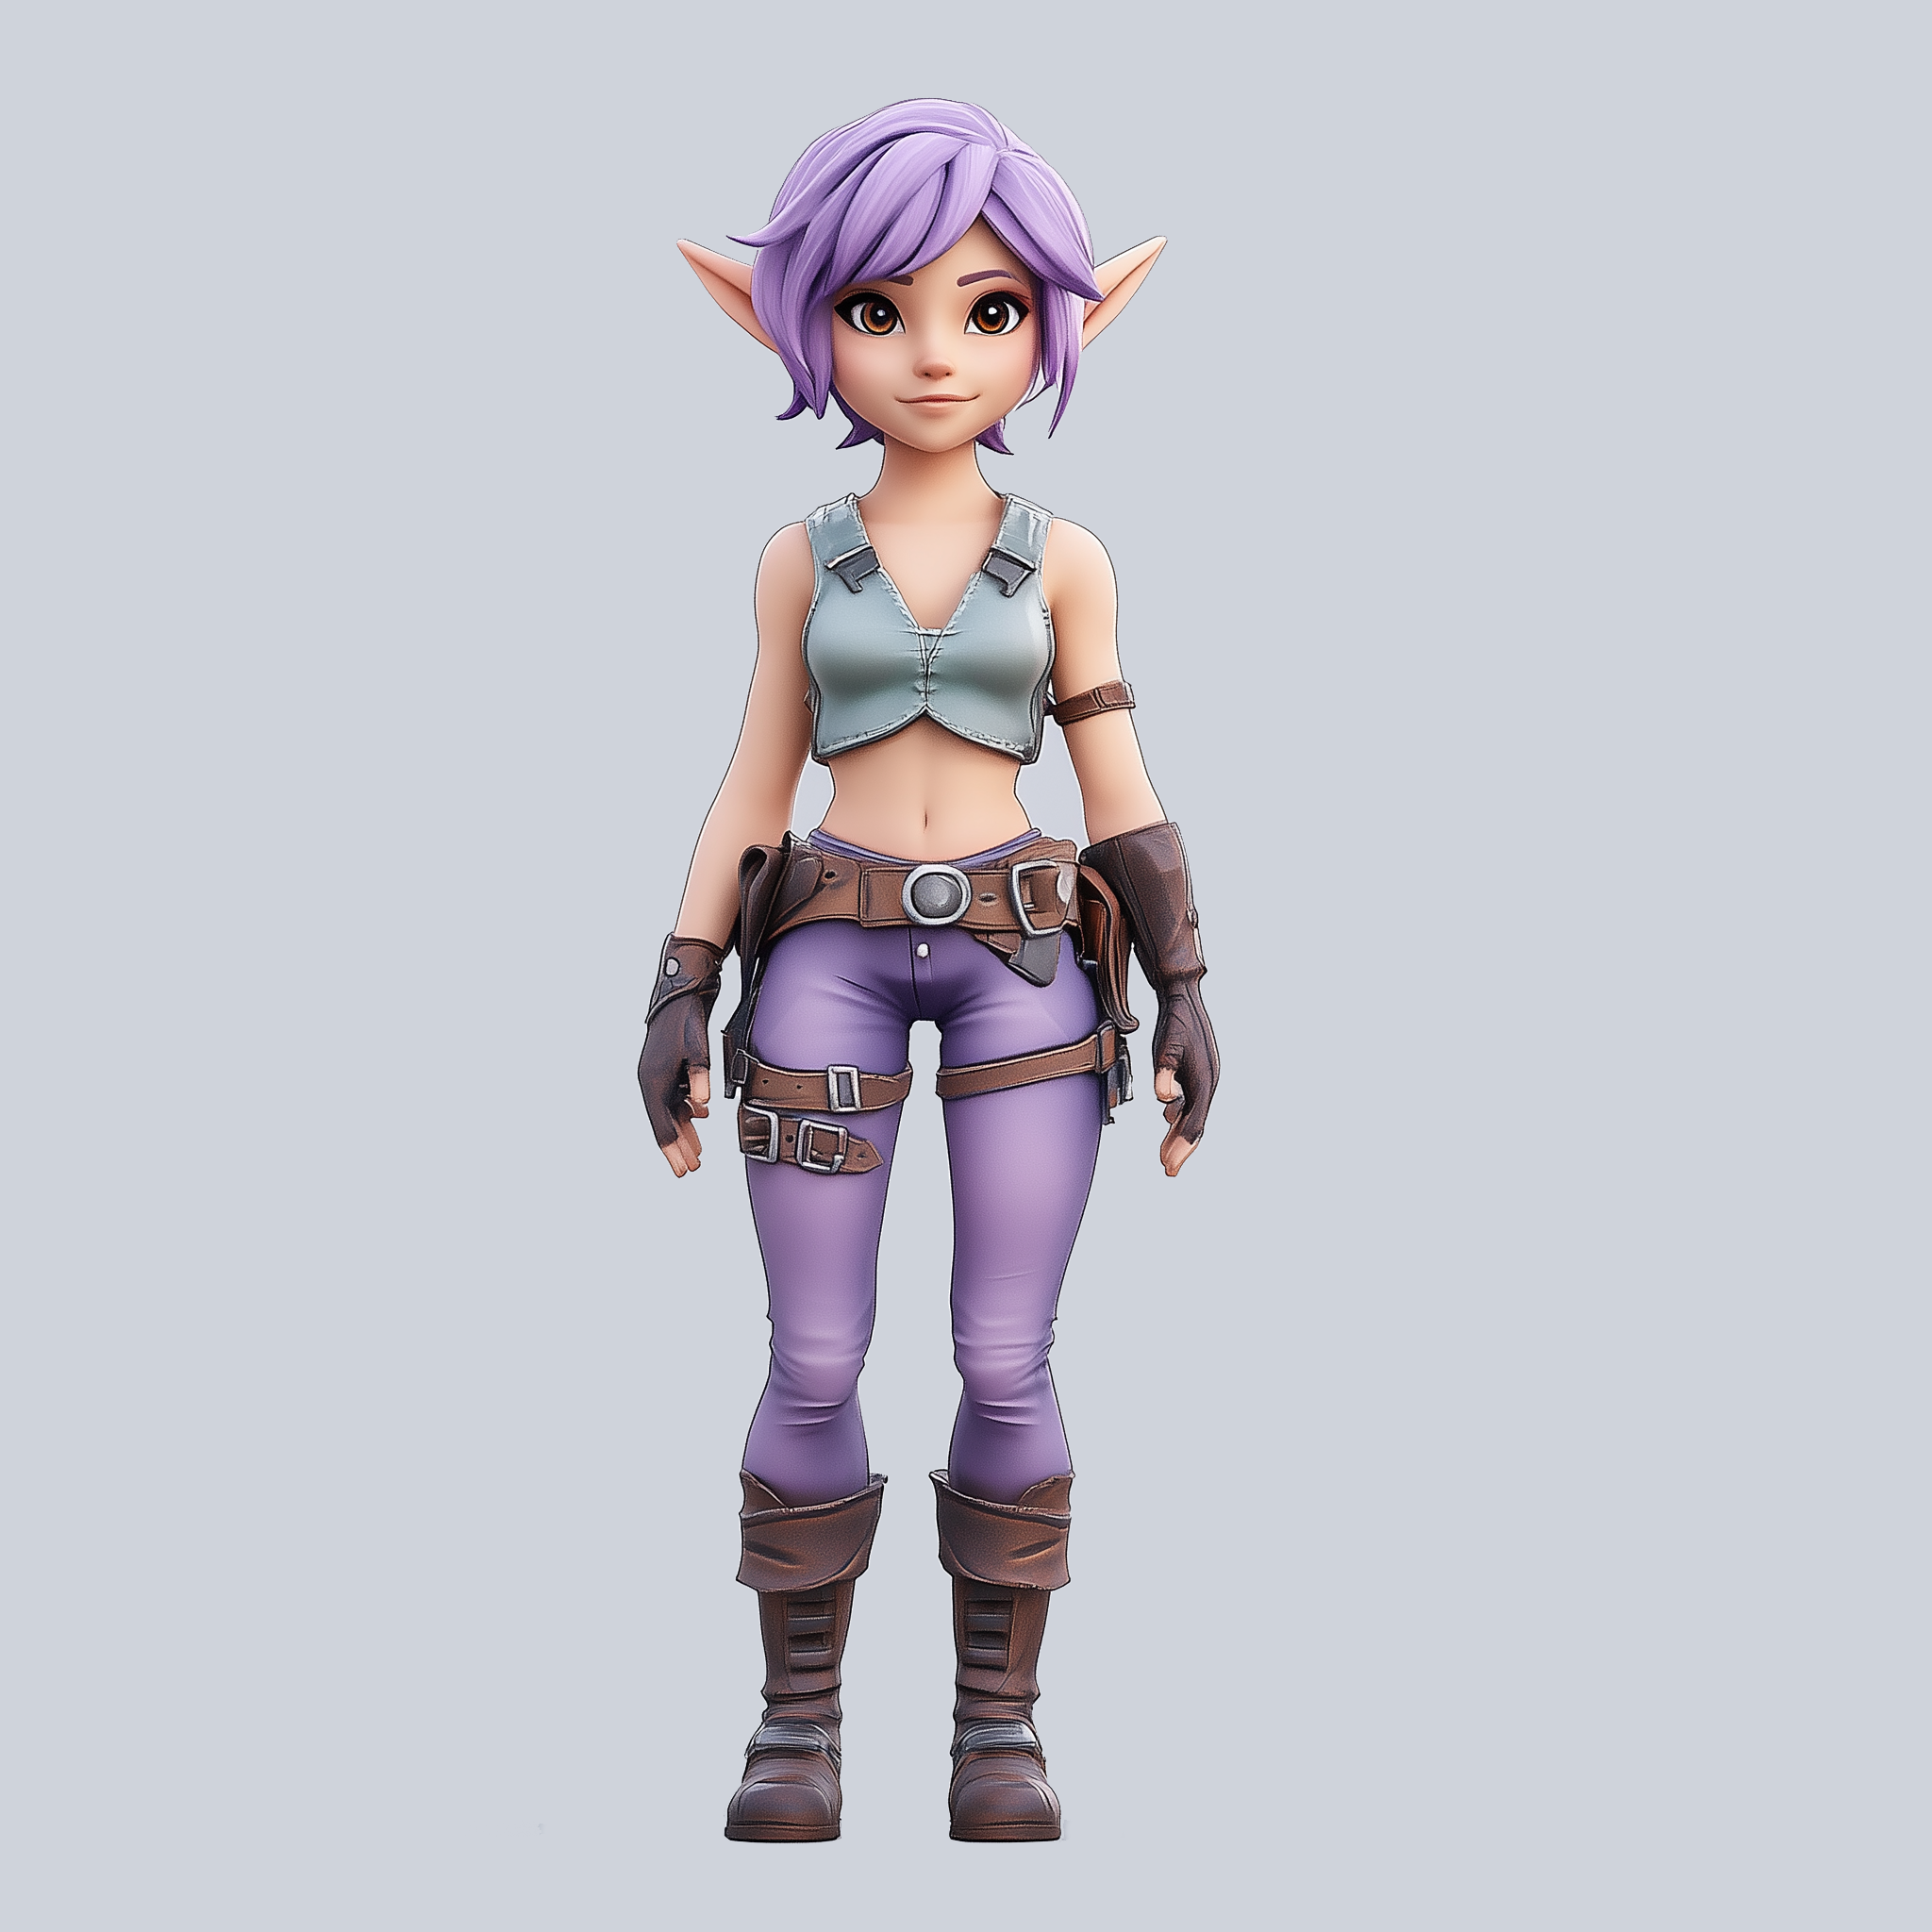
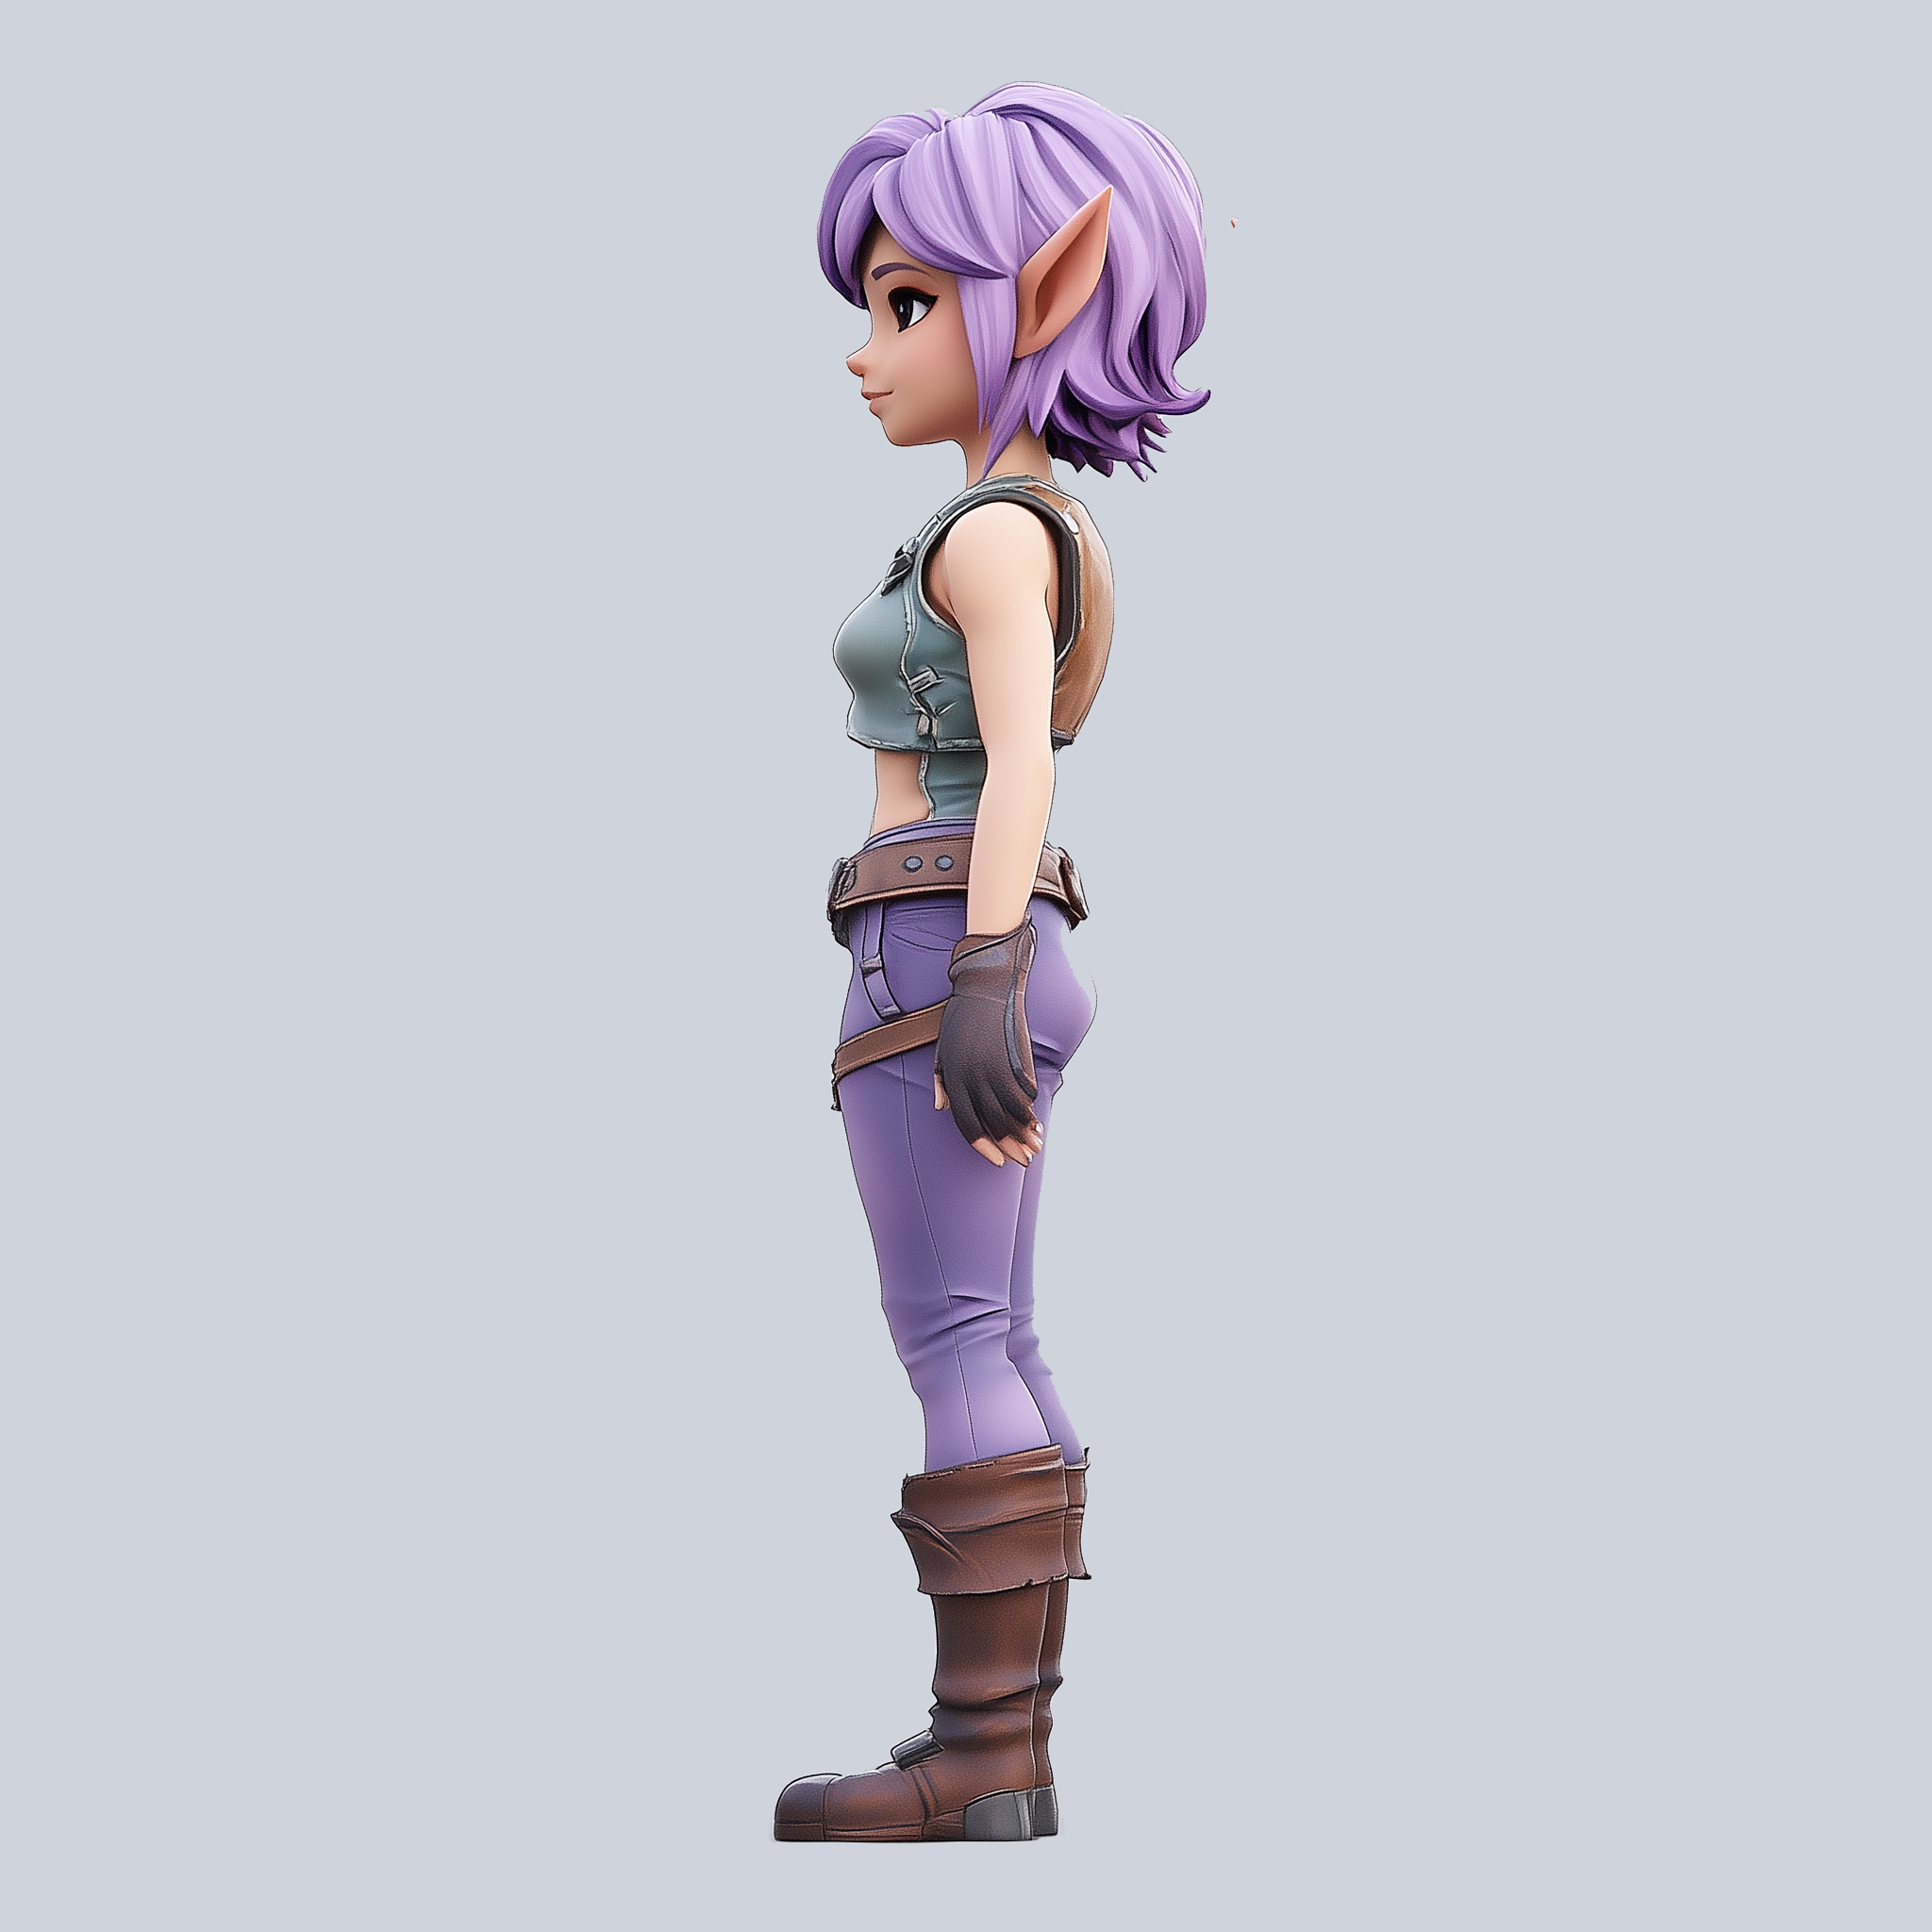
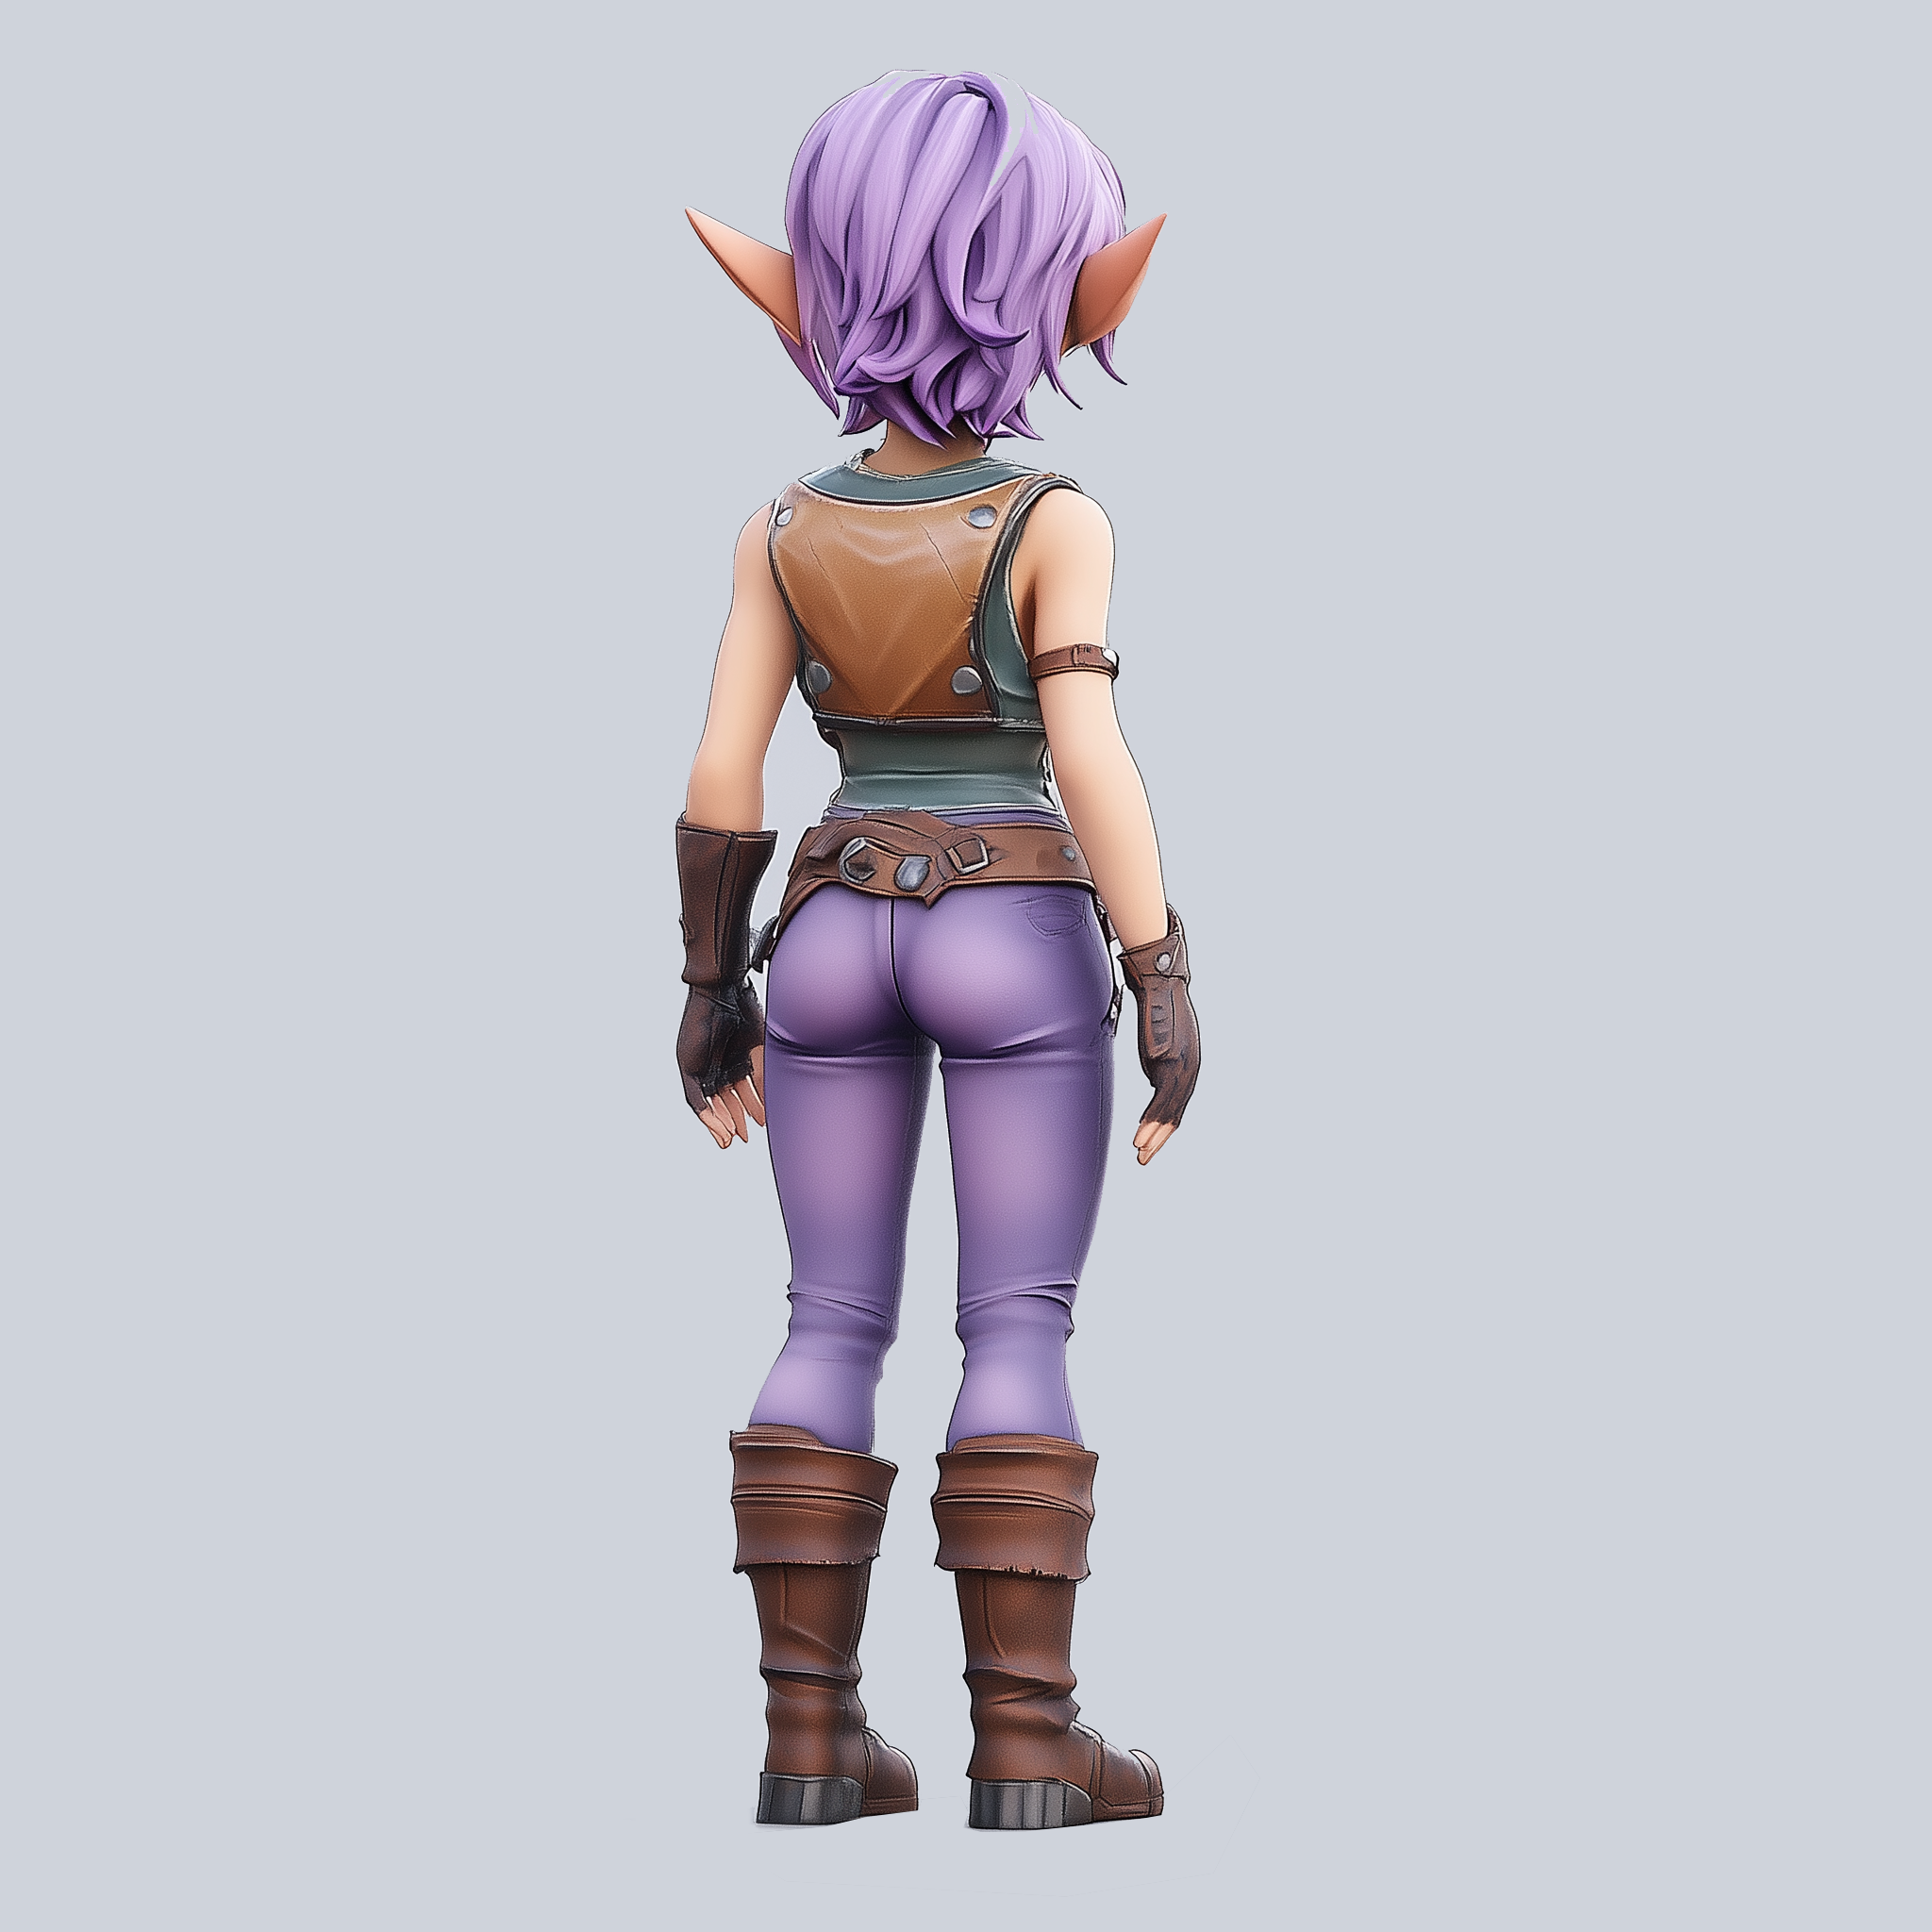
在本示例中,输入图像已经过预处理,去除了多余的背景。在实际使用中,你可以使用类似 [ComfyUI\_essentials](https://github.com/cubiq/ComfyUI_essentials) 的自定义节点来自动去除多余背景。
### 2. 手动安装模型
下载下面的模型,并保存到对应的 ComfyUI 文件夹。
* hunyuan3d-dit-v2-mv:[model.fp16.safetensors](https://huggingface.co/tencent/Hunyuan3D-2mv/blob/main/hunyuan3d-dit-v2-mv/model.fp16.safetensors?download=true) 下载后可重命名为 `hunyuan3d-dit-v2-mv.safetensors`
```
ComfyUI/
├── models/
│ ├── checkpoints/
│ │ └── hunyuan3d-dit-v2-mv.safetensors // 重命名后的文件
```
### 3. 按步骤运行工作流
立即在 Comfy Cloud 上运行此工作流
下载 JSON 或在模板库中搜索“HY 3D 2.0 MV”
**输入材料**
将这些文件上传到对应的 `LoadImage` 节点:
`LoadImage` 节点 56 · 前视图
`LoadImage` 节点 78 · 左视图
`LoadImage` 节点 80 · 后视图
`LoadImage` 节点 87 · 右视图
### 1. 工作流
请下载下面的图片,并拖入 ComfyUI 以加载工作流。

下载下面的图片,我们将把它们用作输入图像。



在本示例中,输入图像已经过预处理,去除了多余的背景。在实际使用中,你可以使用类似 [ComfyUI\_essentials](https://github.com/cubiq/ComfyUI_essentials) 的自定义节点来自动去除多余背景。
### 2. 手动安装模型
下载下面的模型,并保存到对应的 ComfyUI 文件夹。
* hunyuan3d-dit-v2-mv:[model.fp16.safetensors](https://huggingface.co/tencent/Hunyuan3D-2mv/blob/main/hunyuan3d-dit-v2-mv/model.fp16.safetensors?download=true) 下载后可重命名为 `hunyuan3d-dit-v2-mv.safetensors`
```
ComfyUI/
├── models/
│ ├── checkpoints/
│ │ └── hunyuan3d-dit-v2-mv.safetensors // 重命名后的文件
```
### 3. 按步骤运行工作流
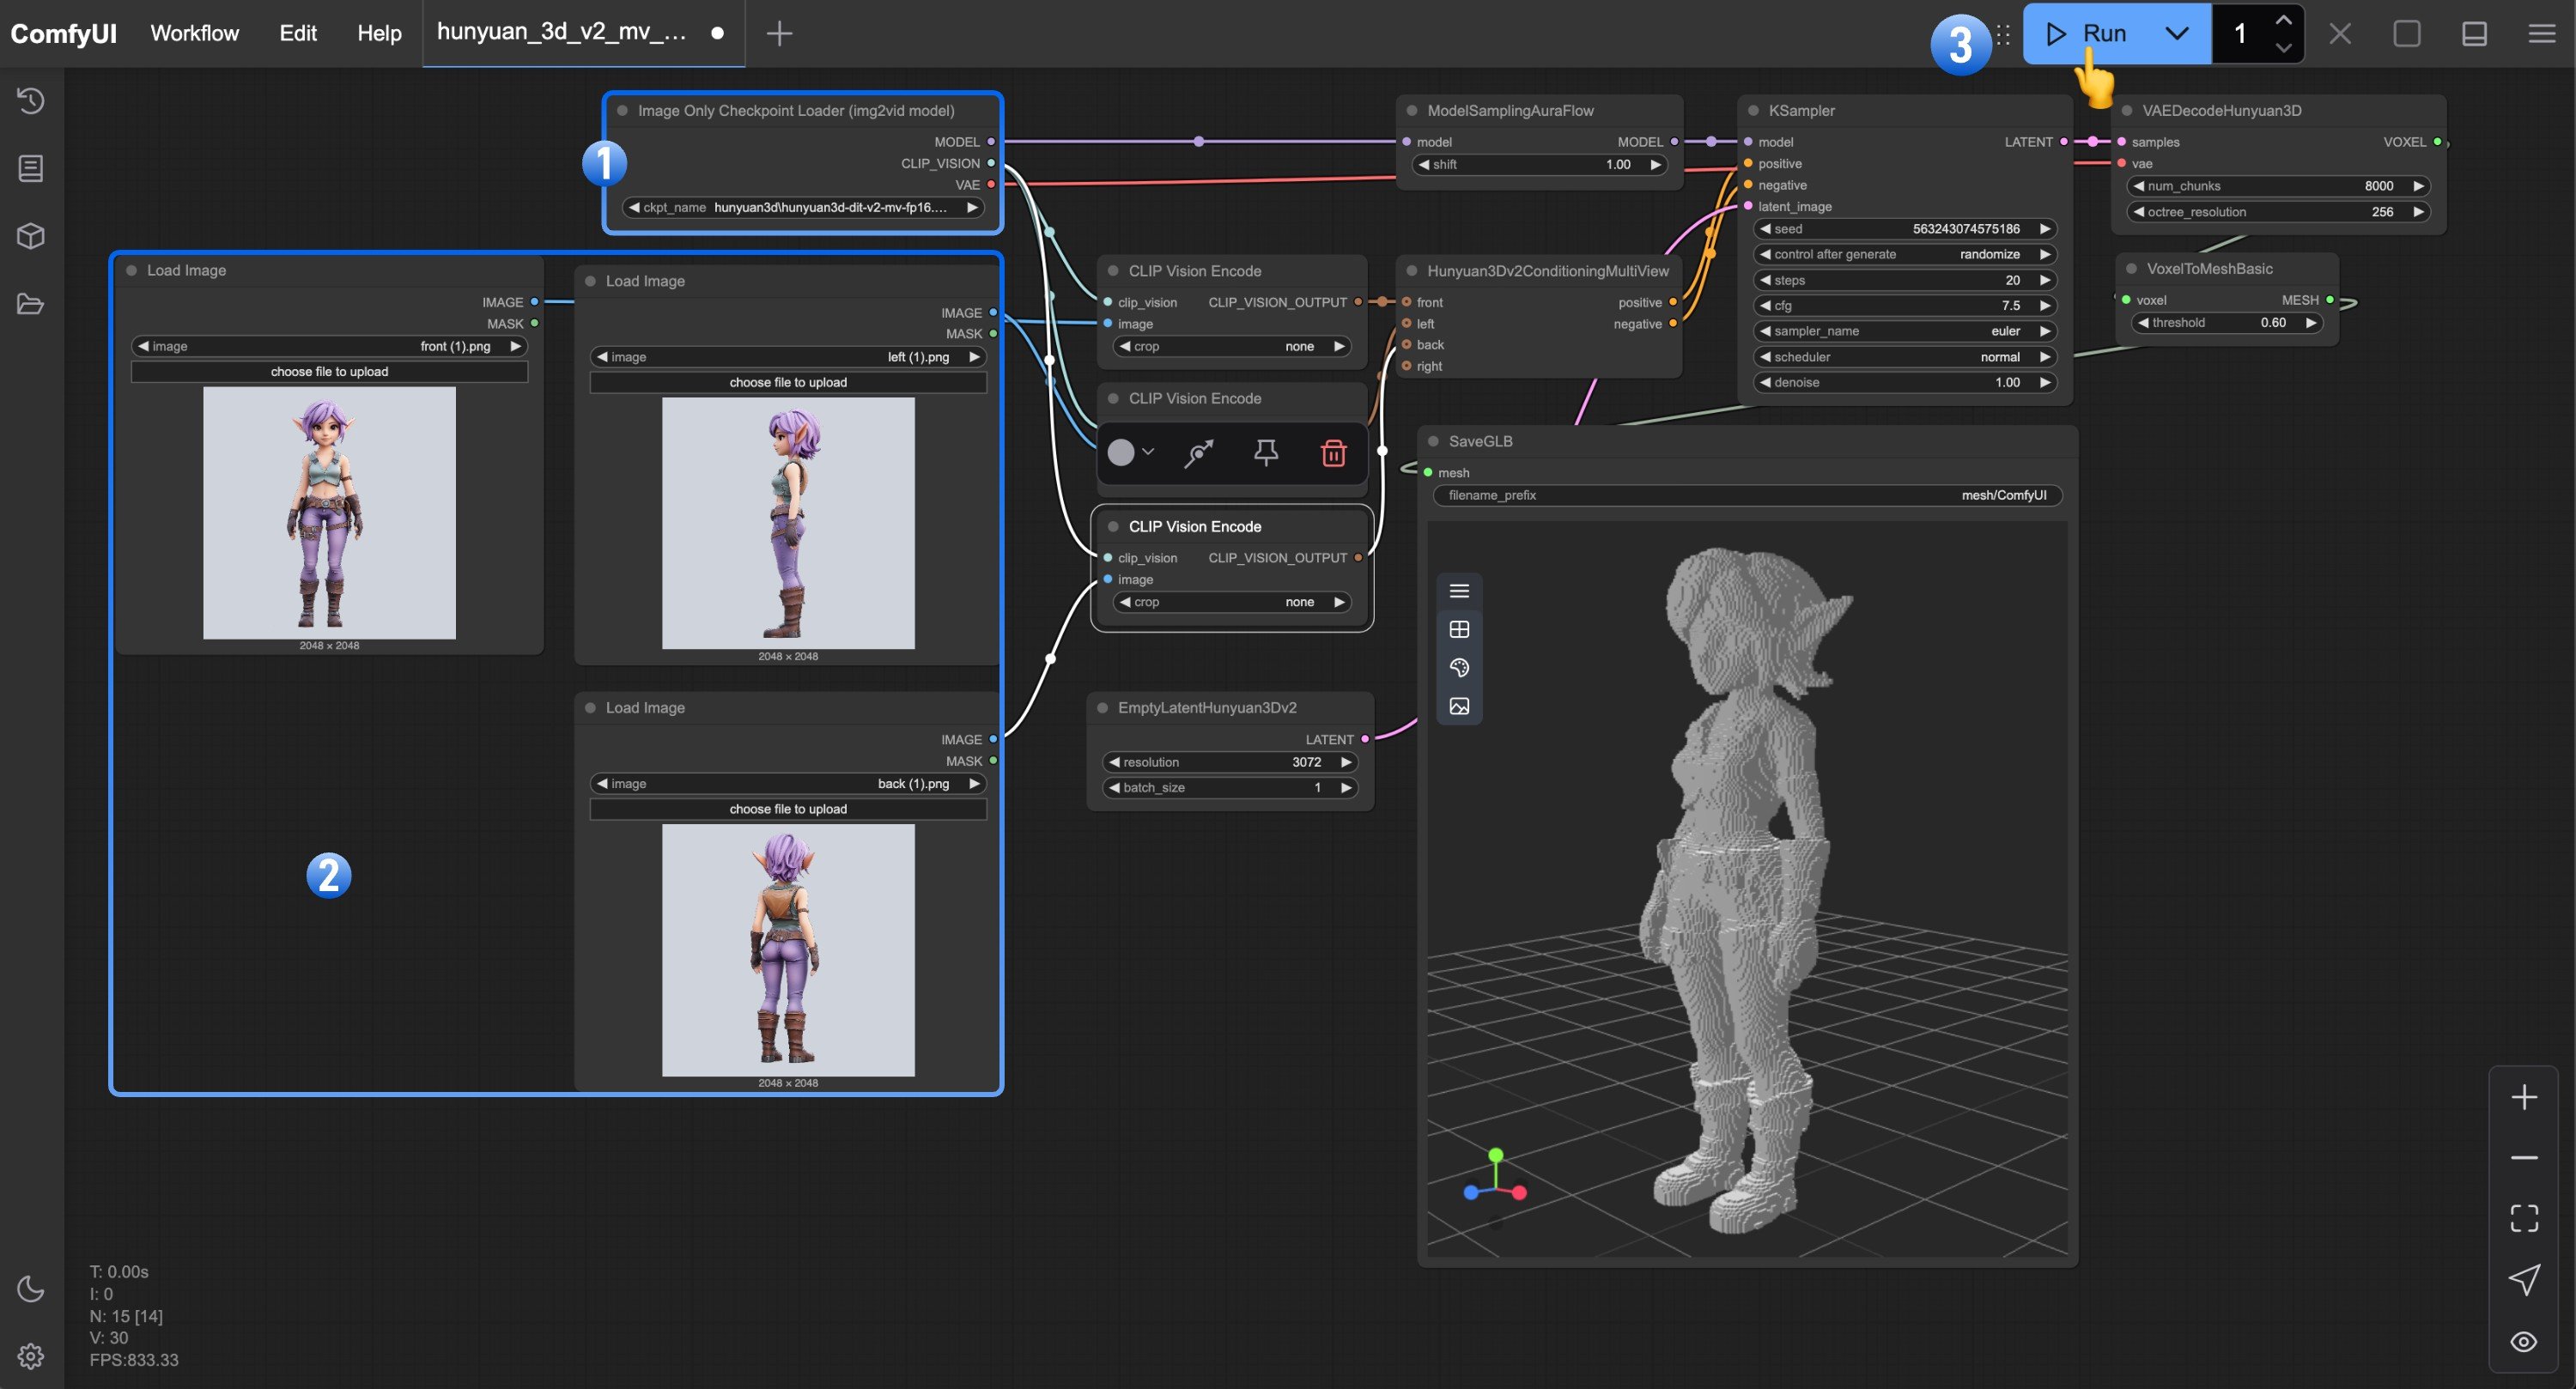 1. 确保 Image Only Checkpoint Loader (img2vid model) 加载了我们下载并重命名的 `hunyuan3d-dit-v2-mv.safetensors` 模型
2. 在每个 `Load Image` 节点中加载对应视角的图片
3. 点击 `Queue` 按钮,或使用快捷键 `Ctrl(cmd) + Enter(回车)` 运行工作流
如果你需要增加更多视角,请确保在 `Hunyuan3Dv2ConditioningMultiView` 节点中加载其它视角的图片,并确保在 `Load Image` 节点中加载了对应视角的图片。
## Hunyuan3D-2mv-turbo 工作流
在 Hunyuan3D-2mv-turbo 工作流中,我们将使用 Hunyuan3D-2mv-turbo 模型来生成 3D 模型。该模型是 Hunyuan3D-2mv 的分步蒸馏版本,可以更快地生成 3D 模型。在此版本的工作流中,我们将 `cfg` 设置为 1.0,并添加一个 `flux guidance` 节点来控制 `distilled cfg` 的生成。
1. 确保 Image Only Checkpoint Loader (img2vid model) 加载了我们下载并重命名的 `hunyuan3d-dit-v2-mv.safetensors` 模型
2. 在每个 `Load Image` 节点中加载对应视角的图片
3. 点击 `Queue` 按钮,或使用快捷键 `Ctrl(cmd) + Enter(回车)` 运行工作流
如果你需要增加更多视角,请确保在 `Hunyuan3Dv2ConditioningMultiView` 节点中加载其它视角的图片,并确保在 `Load Image` 节点中加载了对应视角的图片。
## Hunyuan3D-2mv-turbo 工作流
在 Hunyuan3D-2mv-turbo 工作流中,我们将使用 Hunyuan3D-2mv-turbo 模型来生成 3D 模型。该模型是 Hunyuan3D-2mv 的分步蒸馏版本,可以更快地生成 3D 模型。在此版本的工作流中,我们将 `cfg` 设置为 1.0,并添加一个 `flux guidance` 节点来控制 `distilled cfg` 的生成。
HY 3D 2.0 MV Turbo
使用 Hunyuan3D 2.0 MV Turbo 从多视角生成 3D 模型。
 在 Comfy Cloud 上立即运行此工作流
下载 JSON 或在模板库中搜索 "HY 3D 2.0 MV Turbo"
**输入材料**
将以下文件上传到对应的 `LoadImage` 节点:
`LoadImage` 节点 56 · 前视图
`LoadImage` 节点 82 · 后视图
`LoadImage` 节点 85 · 左视图
`LoadImage` 节点 87 · 右视图
### 1. 工作流
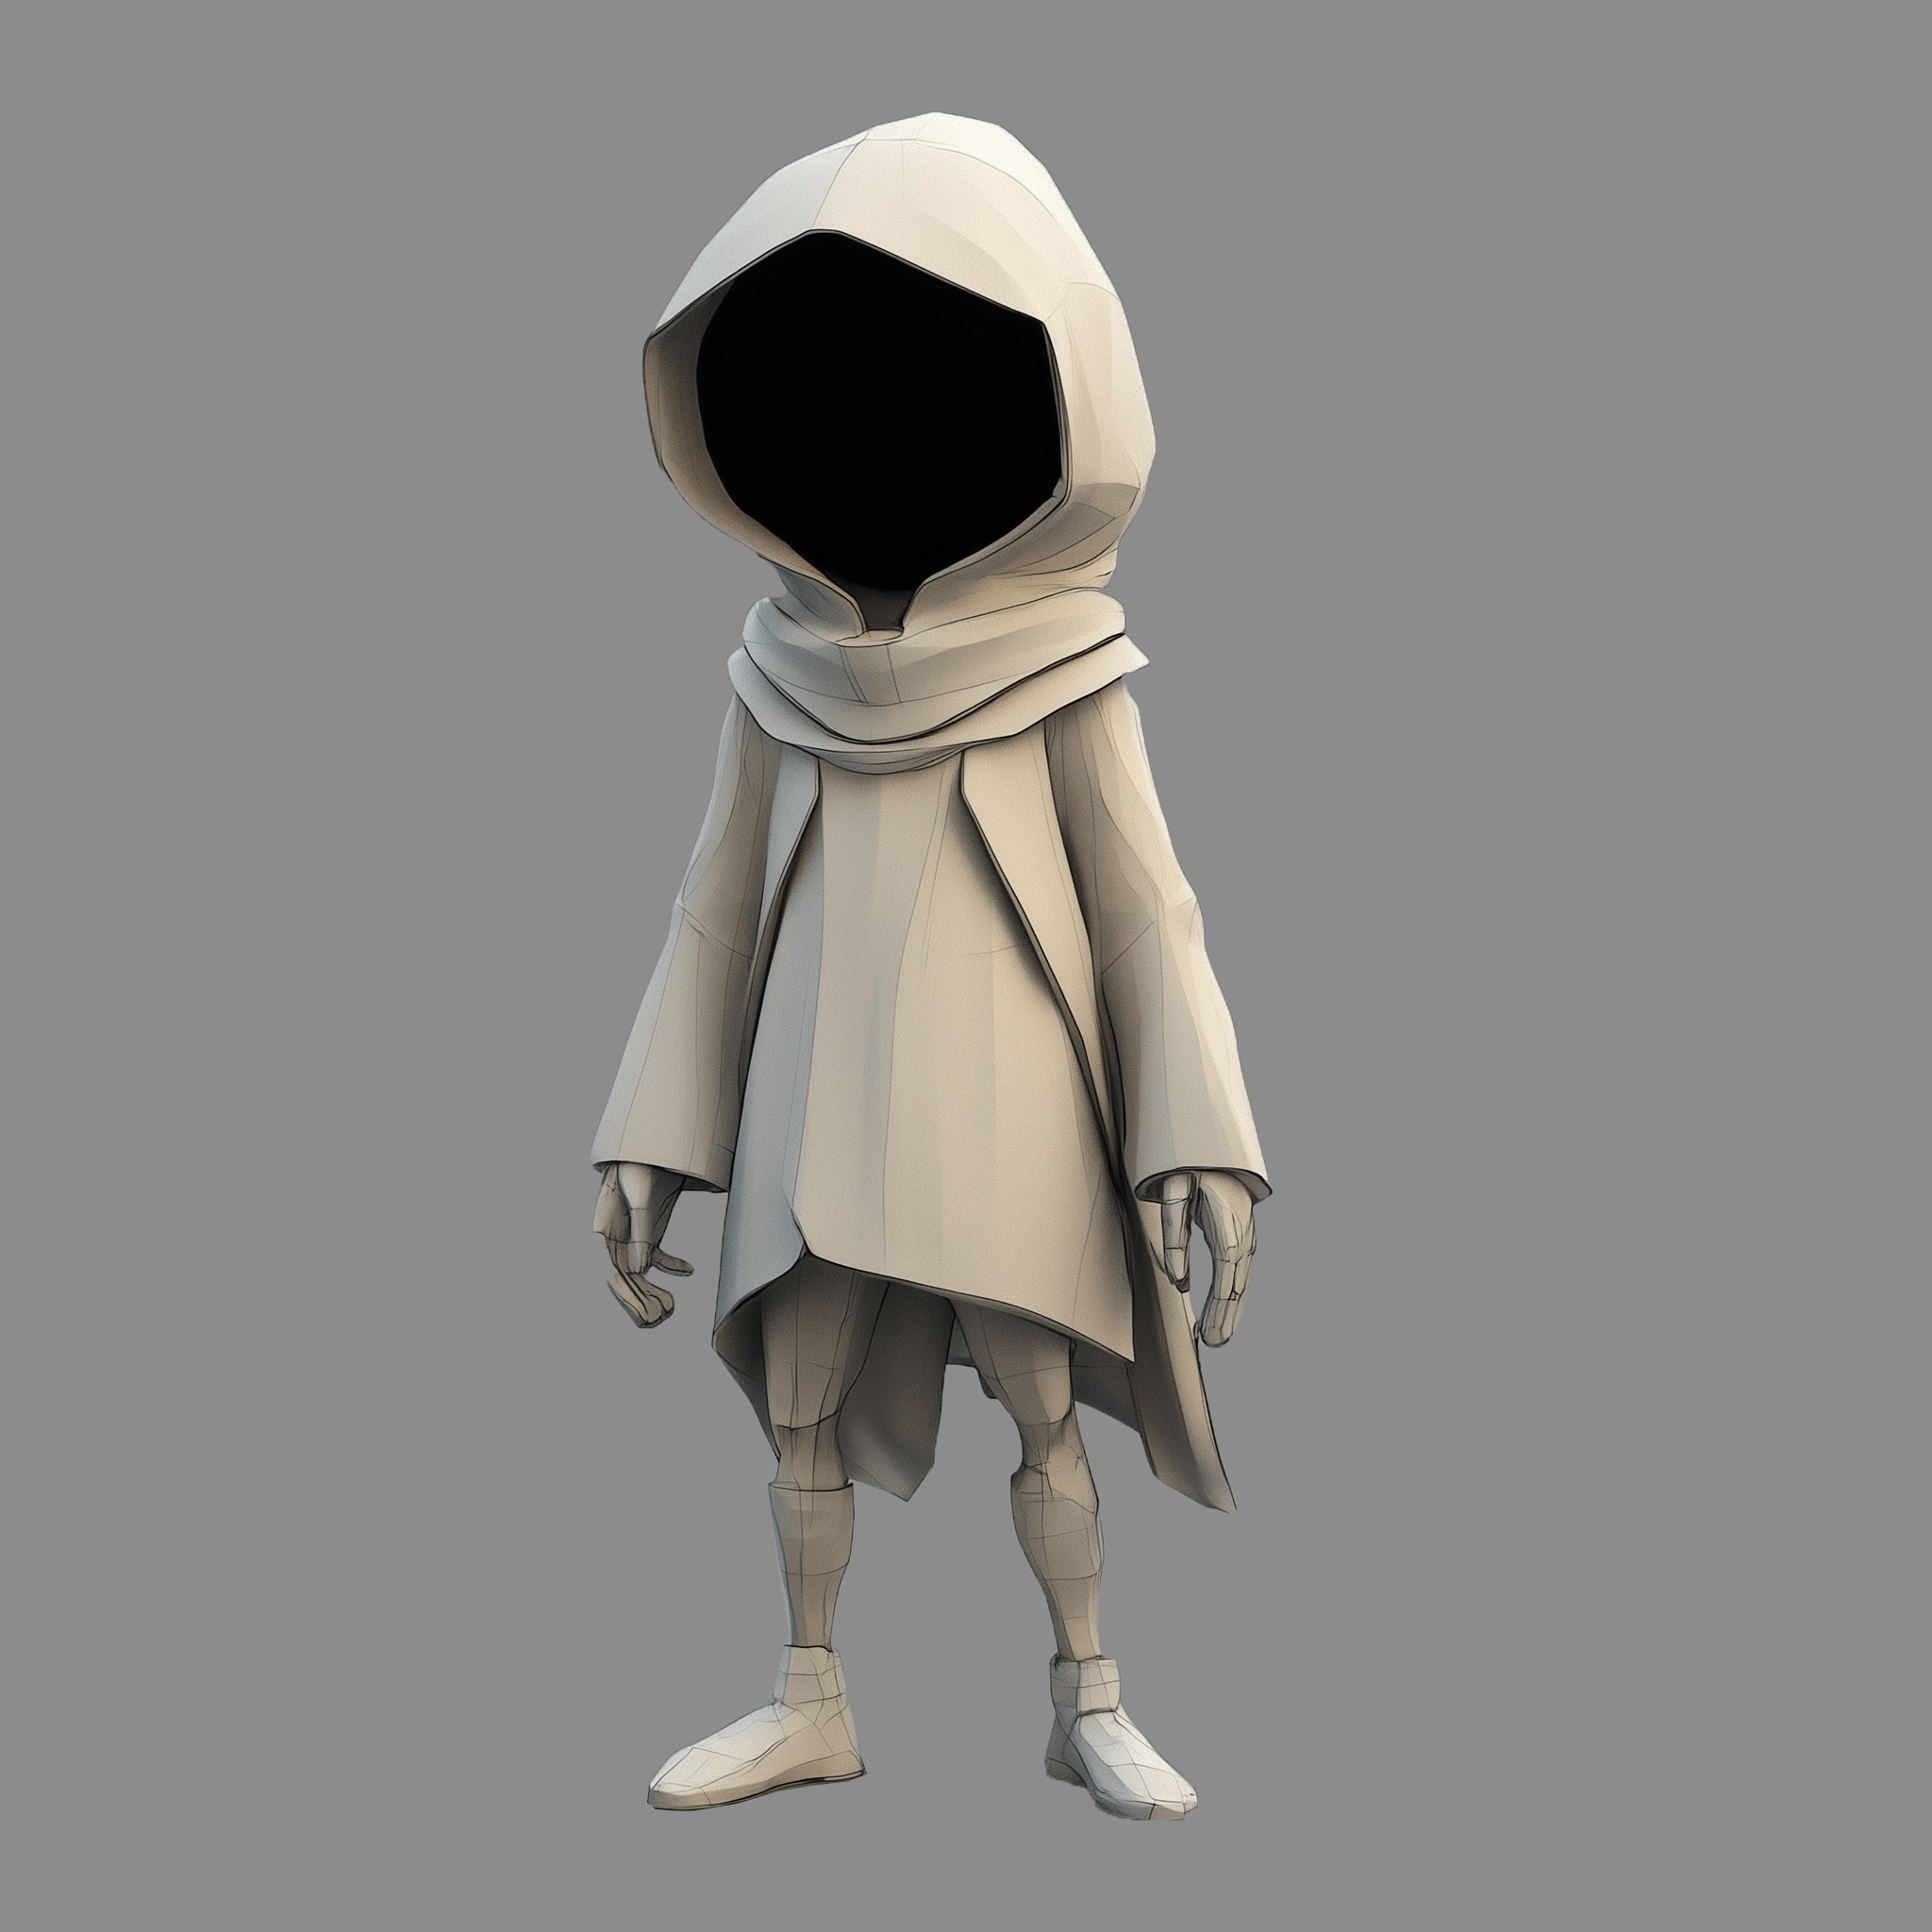
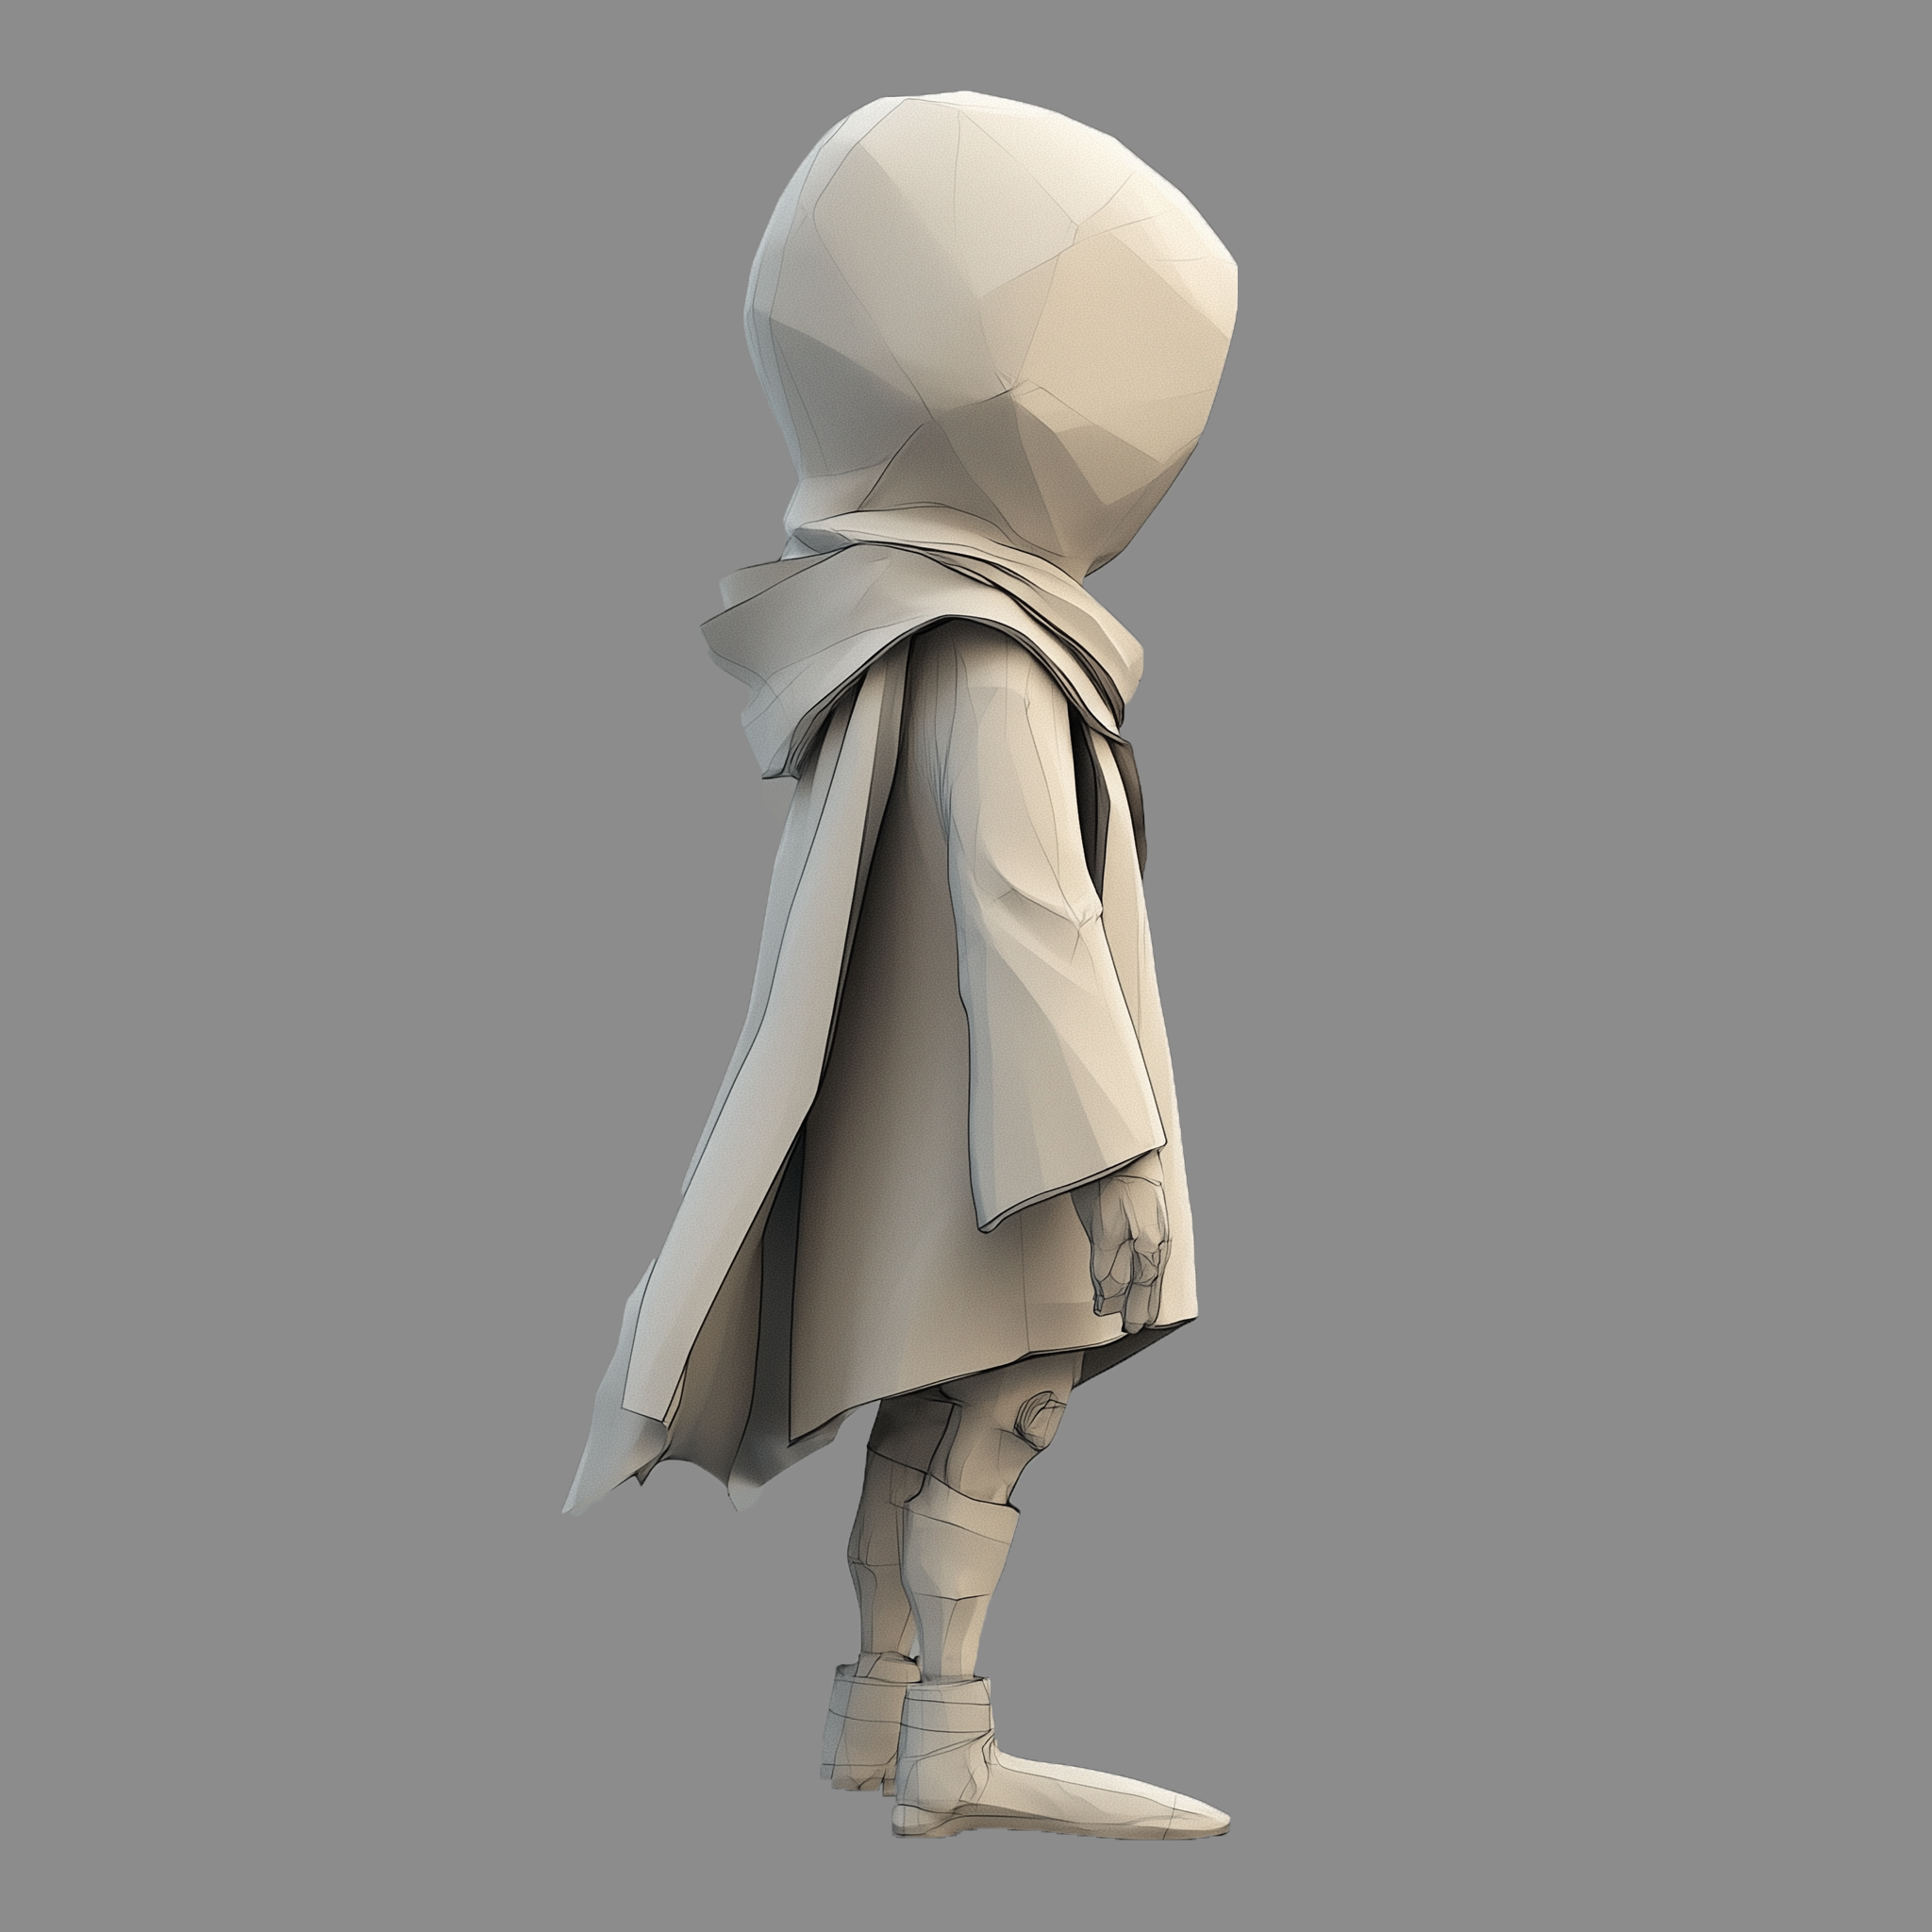
请下载下面的图片,并拖入 ComfyUI 以加载工作流。

下载下面的图像,我们将它们用作输入图像。
### 2. 手动安装模型
下载下面的模型,并保存到对应的 ComfyUI 文件夹。
* hunyuan3d-dit-v2-mv-turbo:[model.fp16.safetensors](https://huggingface.co/tencent/Hunyuan3D-2mv/blob/main/hunyuan3d-dit-v2-mv-turbo/model.fp16.safetensors?download=true)。下载后,可将其重命名为 `hunyuan3d-dit-v2-mv-turbo.safetensors`
```
ComfyUI/
├── models/
│ ├── checkpoints/
│ │ └── hunyuan3d-dit-v2-mv-turbo.safetensors // renamed file
```
### 3. 按步骤运行工作流
在 Comfy Cloud 上立即运行此工作流
下载 JSON 或在模板库中搜索 "HY 3D 2.0 MV Turbo"
**输入材料**
将以下文件上传到对应的 `LoadImage` 节点:
`LoadImage` 节点 56 · 前视图
`LoadImage` 节点 82 · 后视图
`LoadImage` 节点 85 · 左视图
`LoadImage` 节点 87 · 右视图
### 1. 工作流
请下载下面的图片,并拖入 ComfyUI 以加载工作流。

下载下面的图像,我们将它们用作输入图像。


### 2. 手动安装模型
下载下面的模型,并保存到对应的 ComfyUI 文件夹。
* hunyuan3d-dit-v2-mv-turbo:[model.fp16.safetensors](https://huggingface.co/tencent/Hunyuan3D-2mv/blob/main/hunyuan3d-dit-v2-mv-turbo/model.fp16.safetensors?download=true)。下载后,可将其重命名为 `hunyuan3d-dit-v2-mv-turbo.safetensors`
```
ComfyUI/
├── models/
│ ├── checkpoints/
│ │ └── hunyuan3d-dit-v2-mv-turbo.safetensors // renamed file
```
### 3. 按步骤运行工作流
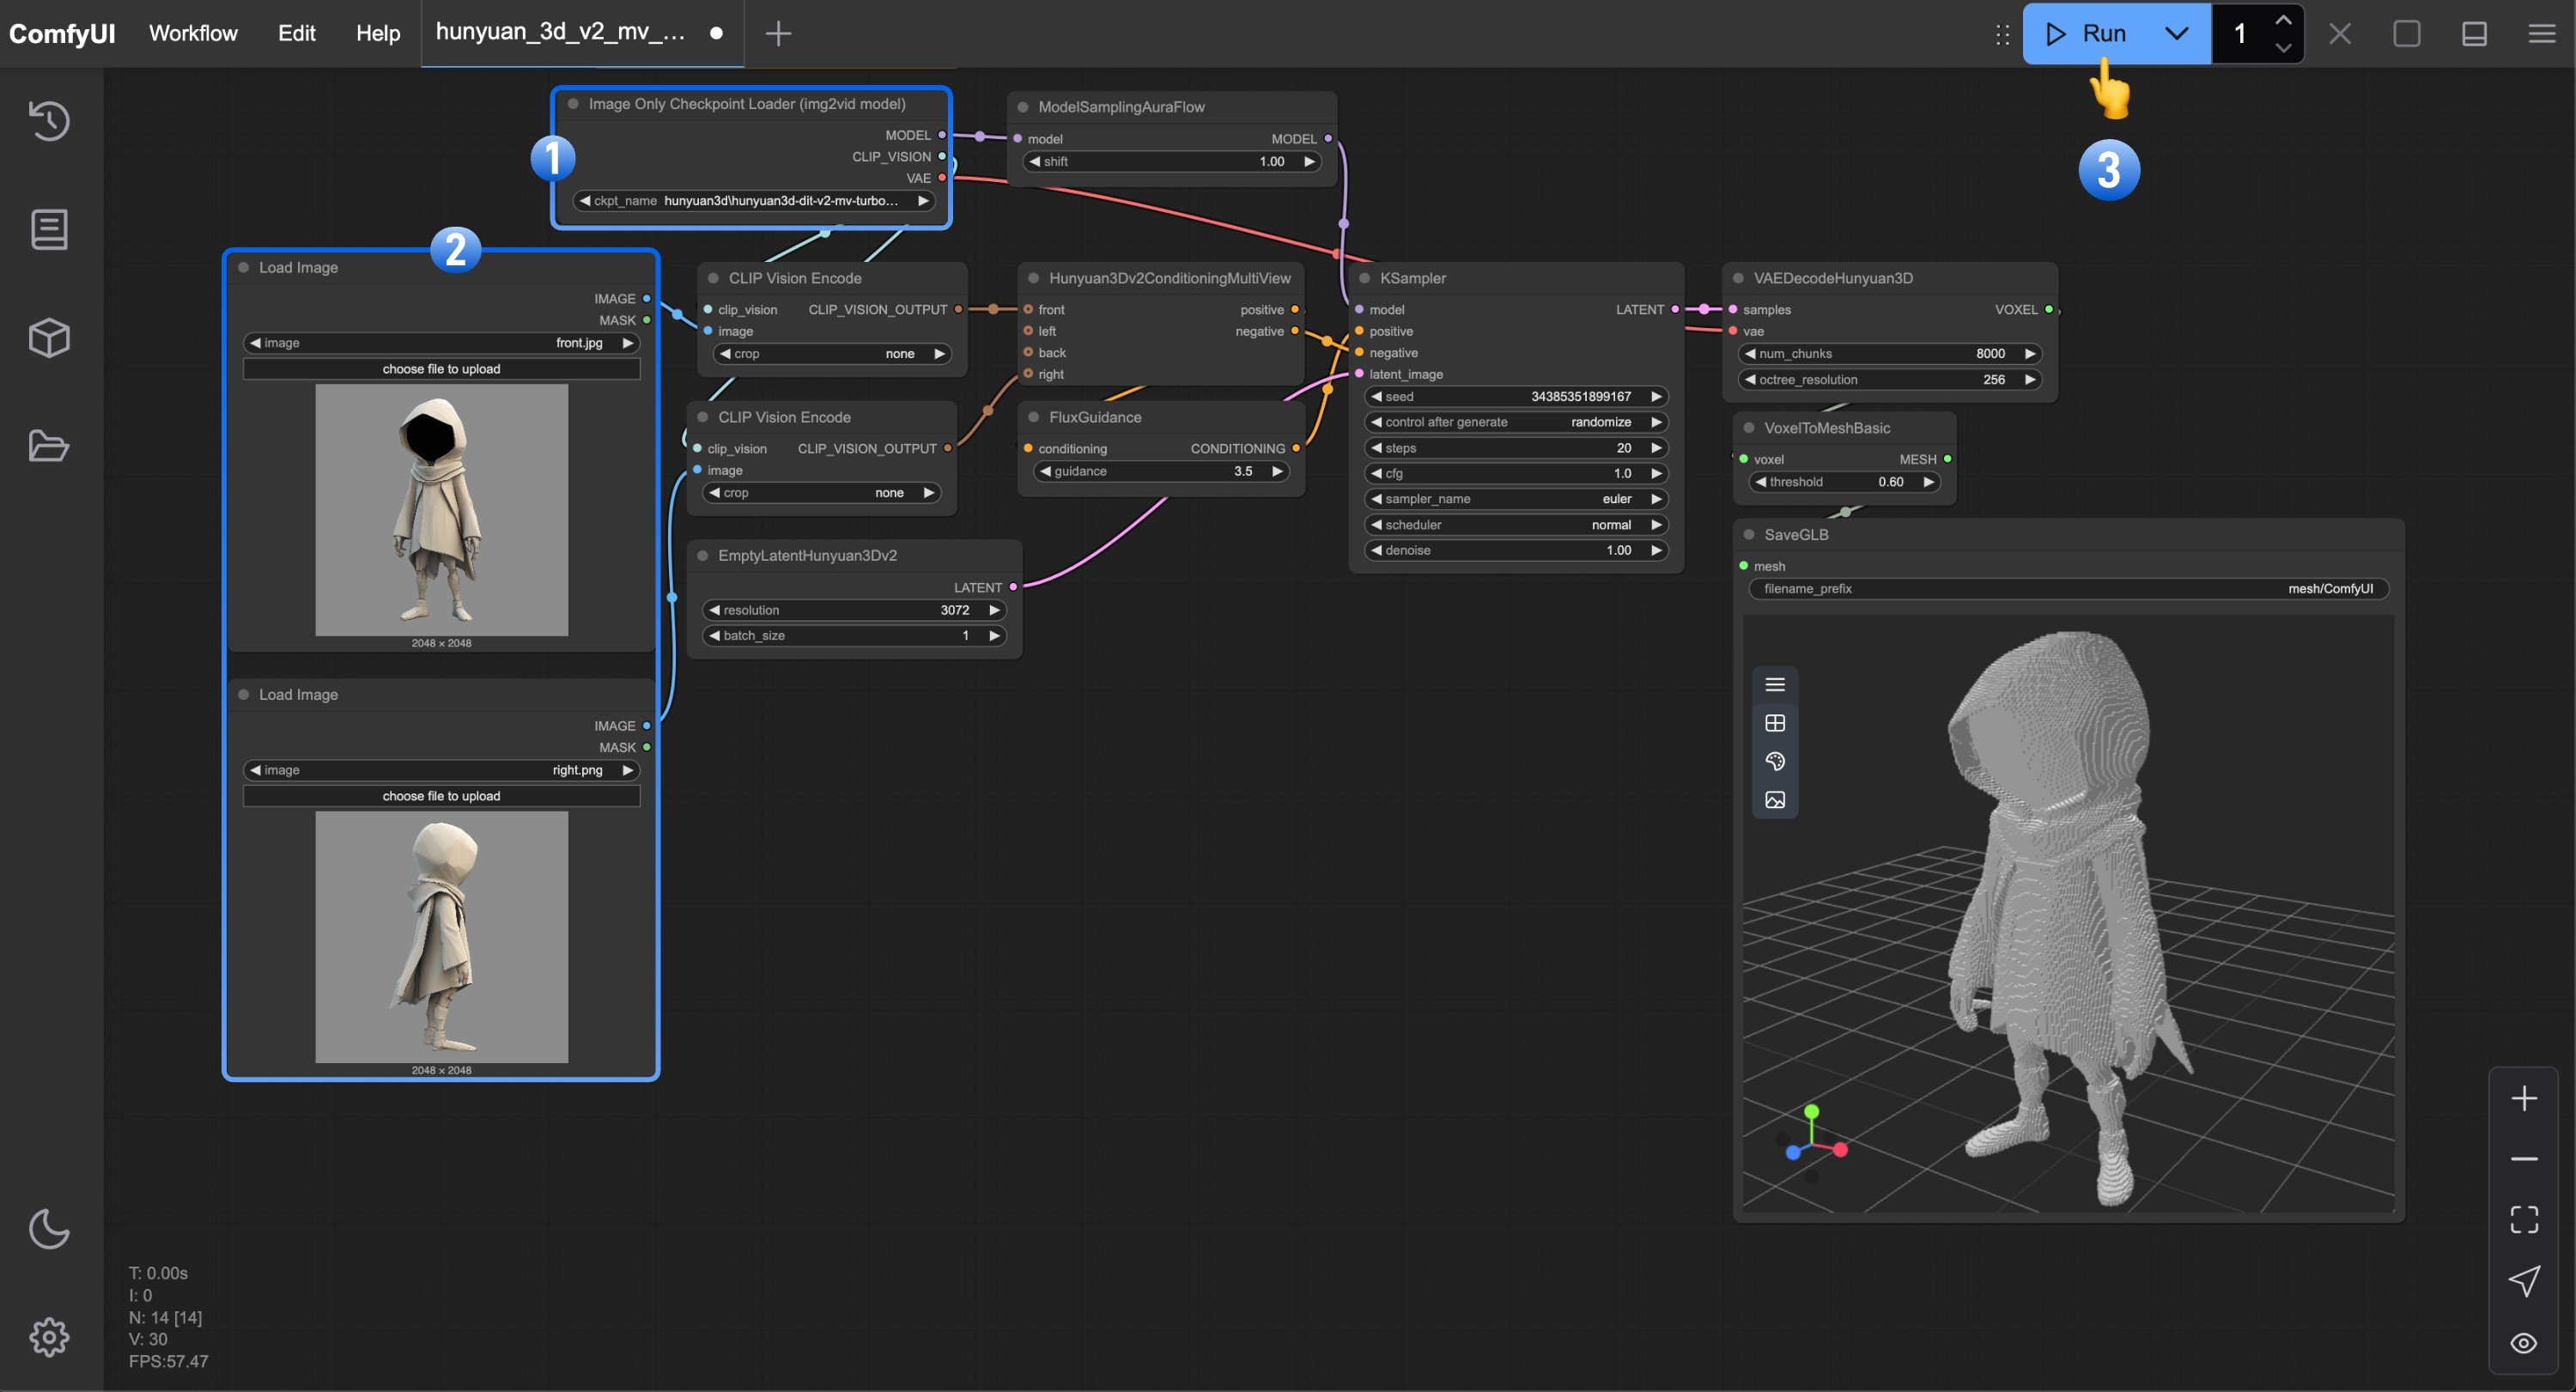 1. 确保 `Image Only Checkpoint Loader(img2vid model)` 节点已加载我们重命名后的 `hunyuan3d-dit-v2-mv-turbo.safetensors` 模型。
2. 在每个 `Load Image` 节点中加载对应的视角图像。
3. 点击 `Queue` 按钮,或使用快捷键 `Ctrl(cmd) + Enter` 来运行工作流。
## Hunyuan3D-2 单视图工作流
在 Hunyuan3D-2 工作流中,我们将使用 Hunyuan3D-2 模型来生成 3D 模型。这个模型不是多视角模型。在这个工作流中,我们使用 `Hunyuan3Dv2Conditioning` 节点,而不是 `Hunyuan3Dv2ConditioningMultiView` 节点。
1. 确保 `Image Only Checkpoint Loader(img2vid model)` 节点已加载我们重命名后的 `hunyuan3d-dit-v2-mv-turbo.safetensors` 模型。
2. 在每个 `Load Image` 节点中加载对应的视角图像。
3. 点击 `Queue` 按钮,或使用快捷键 `Ctrl(cmd) + Enter` 来运行工作流。
## Hunyuan3D-2 单视图工作流
在 Hunyuan3D-2 工作流中,我们将使用 Hunyuan3D-2 模型来生成 3D 模型。这个模型不是多视角模型。在这个工作流中,我们使用 `Hunyuan3Dv2Conditioning` 节点,而不是 `Hunyuan3Dv2ConditioningMultiView` 节点。
HY 3D 2.0
使用 Hunyuan3D 2.0 从单张图像生成 3D 模型。
 立即在 Comfy Cloud 上运行此工作流
下载 JSON 或在模板库中搜索 "HY 3D 2.0"
**输入素材**
将该文件上传到对应的 `LoadImage` 节点:
`LoadImage` 节点 56 · `3d_hunyuan3d_image_to_model_input_image.png`
### 1. 工作流
请下载下方图片并将其拖入 ComfyUI 以加载工作流。

下载下方图片,我们将用它作为输入图像。

### 2. 手动安装模型
下载下方模型并将其保存到对应的 ComfyUI 文件夹:
* hunyuan3d-dit-v2-0: [model.fp16.safetensors](https://huggingface.co/tencent/Hunyuan3D-2/blob/main/hunyuan3d-dit-v2-0/model.fp16.safetensors?download=true) — 下载后可将其重命名为 `hunyuan3d-dit-v2.safetensors`
```
ComfyUI/
├── models/
│ ├── checkpoints/
│ │ └── hunyuan3d-dit-v2.safetensors // 重命名后的文件
```
### 3. 按步骤运行工作流
立即在 Comfy Cloud 上运行此工作流
下载 JSON 或在模板库中搜索 "HY 3D 2.0"
**输入素材**
将该文件上传到对应的 `LoadImage` 节点:
`LoadImage` 节点 56 · `3d_hunyuan3d_image_to_model_input_image.png`
### 1. 工作流
请下载下方图片并将其拖入 ComfyUI 以加载工作流。

下载下方图片,我们将用它作为输入图像。

### 2. 手动安装模型
下载下方模型并将其保存到对应的 ComfyUI 文件夹:
* hunyuan3d-dit-v2-0: [model.fp16.safetensors](https://huggingface.co/tencent/Hunyuan3D-2/blob/main/hunyuan3d-dit-v2-0/model.fp16.safetensors?download=true) — 下载后可将其重命名为 `hunyuan3d-dit-v2.safetensors`
```
ComfyUI/
├── models/
│ ├── checkpoints/
│ │ └── hunyuan3d-dit-v2.safetensors // 重命名后的文件
```
### 3. 按步骤运行工作流
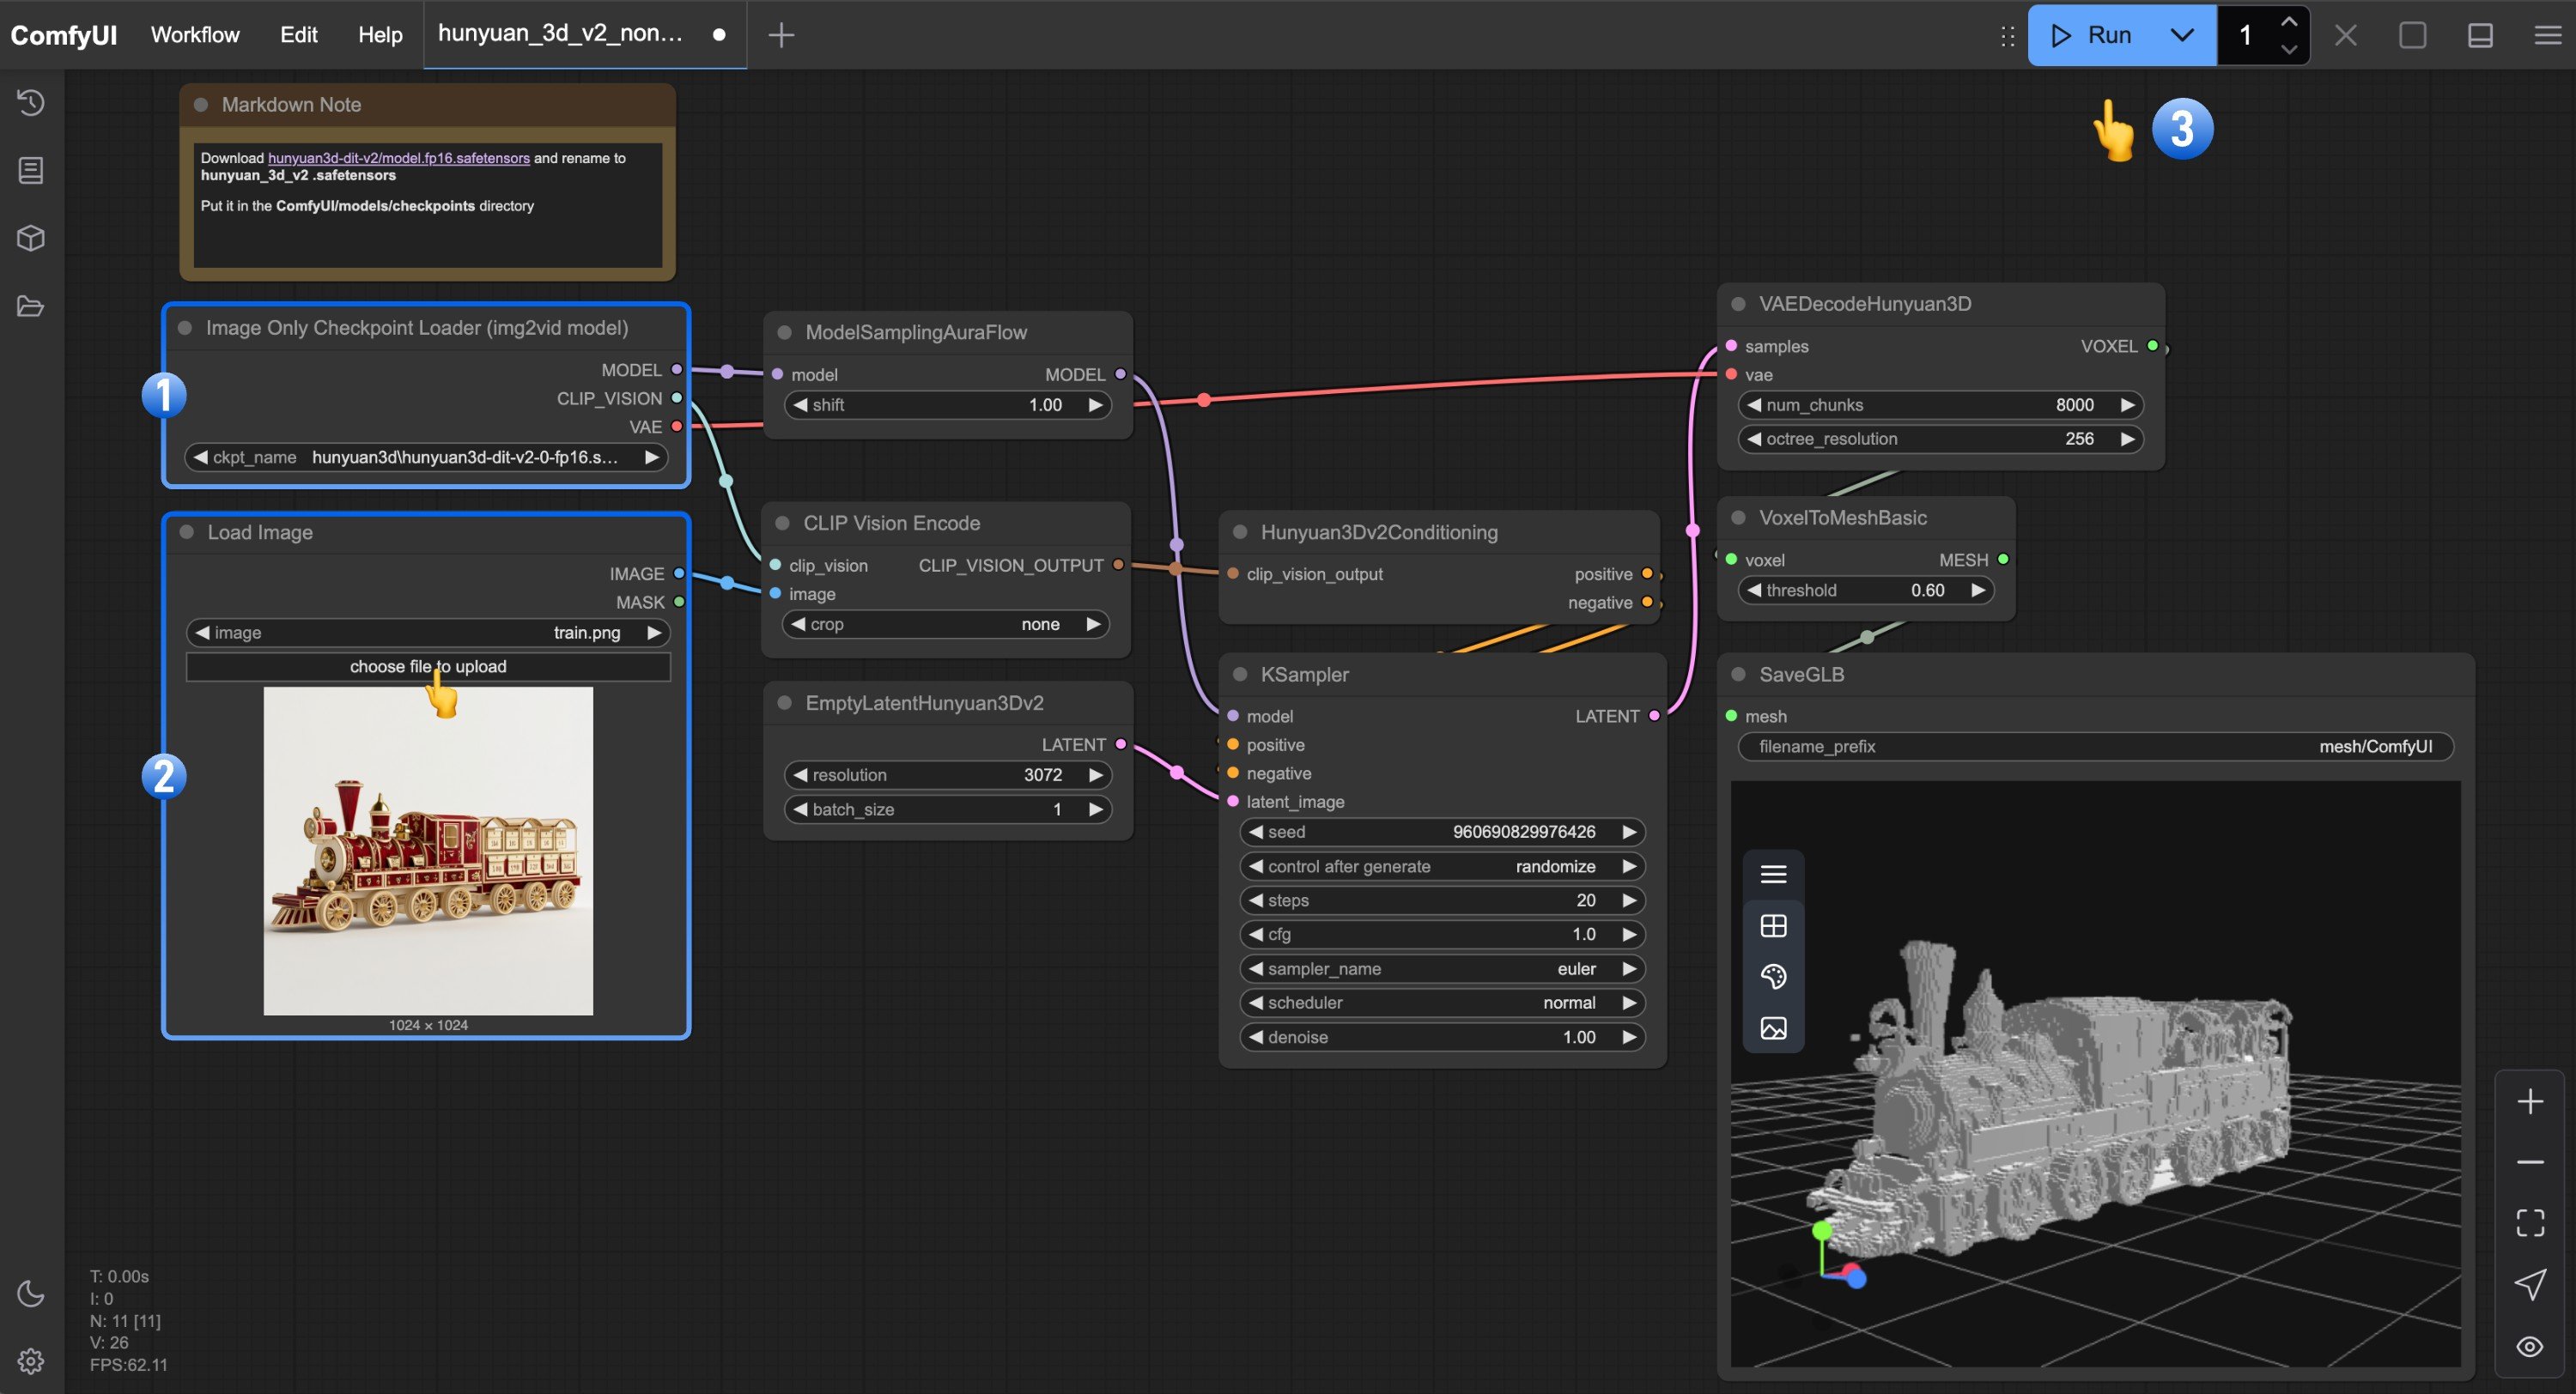 1. 确保 `Image Only Checkpoint Loader(img2vid model)` 节点已加载我们重命名后的 `hunyuan3d-dit-v2.safetensors` 模型
2. 在 `Load Image` 节点中加载图像
3. 点击 `Queue` 按钮,或使用快捷键 `Ctrl(cmd) + Enter` 运行工作流
## 社区资源
下面是 Hunyuan3D-2 的相关的 ComfyUI 社区资源
* [ComfyUI-Hunyuan3DWrapper](https://github.com/kijai/ComfyUI-Hunyuan3DWrapper)
* [Kijai/Hunyuan3D-2\_safetensors](https://huggingface.co/Kijai/Hunyuan3D-2_safetensors/tree/main)
* [ComfyUI-3D-Pack](https://github.com/MrForExample/ComfyUI-3D-Pack)
## 混元3D 2.0 开源模型系列
目前混元3D 2.0 开源了多个模型,覆盖了完整的3D生成流程,你可以访问 [Hunyuan3D-2](https://github.com/Tencent/Hunyuan3D-2) 了解更多。
**Hunyuan3D-2mini 系列**
| 模型 | 描述 | 日期 | 参数 | Huggingface |
| --------------------- | ------------ | ---------- | ---- | ------------------------------------------------------------------------------------ |
| Hunyuan3D-DiT-v2-mini | Mini 图像到形状模型 | 2025-03-18 | 0.6B | [前往](https://huggingface.co/tencent/Hunyuan3D-2mini/tree/main/hunyuan3d-dit-v2-mini) |
**Hunyuan3D-2mv 系列**
| 模型 | 描述 | 日期 | 参数 | Huggingface |
| ------------------------ | ------------------------------- | ---------- | ---- | ------------------------------------------------------------------------------------- |
| Hunyuan3D-DiT-v2-mv-Fast | 指导蒸馏版本,可以将 DIT 推理时间减半 | 2025-03-18 | 1.1B | [前往](https://huggingface.co/tencent/Hunyuan3D-2mv/tree/main/hunyuan3d-dit-v2-mv-fast) |
| Hunyuan3D-DiT-v2-mv | 多视角图像到形状模型,适合需要用多个角度理解场景的 3D 创作 | 2025-03-18 | 1.1B | [前往](https://huggingface.co/tencent/Hunyuan3D-2mv/tree/main/hunyuan3d-dit-v2-mv) |
**Hunyuan3D-2 系列**
| 模型 | 描述 | 日期 | 参数 | Huggingface |
| ----------------------- | ------- | ---------- | ---- | ---------------------------------------------------------------------------------- |
| Hunyuan3D-DiT-v2-0-Fast | 指导蒸馏模型 | 2025-02-03 | 1.1B | [前往](https://huggingface.co/tencent/Hunyuan3D-2/tree/main/hunyuan3d-dit-v2-0-fast) |
| Hunyuan3D-DiT-v2-0 | 图像到形状模型 | 2025-01-21 | 1.1B | [前往](https://huggingface.co/tencent/Hunyuan3D-2/tree/main/hunyuan3d-dit-v2-0) |
| Hunyuan3D-Paint-v2-0 | 纹理生成模型 | 2025-01-21 | 1.3B | [前往](https://huggingface.co/tencent/Hunyuan3D-2/tree/main/hunyuan3d-paint-v2-0) |
| Hunyuan3D-Delight-v2-0 | 图像去光影模型 | 2025-01-21 | 1.3B | [前往](https://huggingface.co/tencent/Hunyuan3D-2/tree/main/hunyuan3d-delight-v2-0) |
1. 确保 `Image Only Checkpoint Loader(img2vid model)` 节点已加载我们重命名后的 `hunyuan3d-dit-v2.safetensors` 模型
2. 在 `Load Image` 节点中加载图像
3. 点击 `Queue` 按钮,或使用快捷键 `Ctrl(cmd) + Enter` 运行工作流
## 社区资源
下面是 Hunyuan3D-2 的相关的 ComfyUI 社区资源
* [ComfyUI-Hunyuan3DWrapper](https://github.com/kijai/ComfyUI-Hunyuan3DWrapper)
* [Kijai/Hunyuan3D-2\_safetensors](https://huggingface.co/Kijai/Hunyuan3D-2_safetensors/tree/main)
* [ComfyUI-3D-Pack](https://github.com/MrForExample/ComfyUI-3D-Pack)
## 混元3D 2.0 开源模型系列
目前混元3D 2.0 开源了多个模型,覆盖了完整的3D生成流程,你可以访问 [Hunyuan3D-2](https://github.com/Tencent/Hunyuan3D-2) 了解更多。
**Hunyuan3D-2mini 系列**
| 模型 | 描述 | 日期 | 参数 | Huggingface |
| --------------------- | ------------ | ---------- | ---- | ------------------------------------------------------------------------------------ |
| Hunyuan3D-DiT-v2-mini | Mini 图像到形状模型 | 2025-03-18 | 0.6B | [前往](https://huggingface.co/tencent/Hunyuan3D-2mini/tree/main/hunyuan3d-dit-v2-mini) |
**Hunyuan3D-2mv 系列**
| 模型 | 描述 | 日期 | 参数 | Huggingface |
| ------------------------ | ------------------------------- | ---------- | ---- | ------------------------------------------------------------------------------------- |
| Hunyuan3D-DiT-v2-mv-Fast | 指导蒸馏版本,可以将 DIT 推理时间减半 | 2025-03-18 | 1.1B | [前往](https://huggingface.co/tencent/Hunyuan3D-2mv/tree/main/hunyuan3d-dit-v2-mv-fast) |
| Hunyuan3D-DiT-v2-mv | 多视角图像到形状模型,适合需要用多个角度理解场景的 3D 创作 | 2025-03-18 | 1.1B | [前往](https://huggingface.co/tencent/Hunyuan3D-2mv/tree/main/hunyuan3d-dit-v2-mv) |
**Hunyuan3D-2 系列**
| 模型 | 描述 | 日期 | 参数 | Huggingface |
| ----------------------- | ------- | ---------- | ---- | ---------------------------------------------------------------------------------- |
| Hunyuan3D-DiT-v2-0-Fast | 指导蒸馏模型 | 2025-02-03 | 1.1B | [前往](https://huggingface.co/tencent/Hunyuan3D-2/tree/main/hunyuan3d-dit-v2-0-fast) |
| Hunyuan3D-DiT-v2-0 | 图像到形状模型 | 2025-01-21 | 1.1B | [前往](https://huggingface.co/tencent/Hunyuan3D-2/tree/main/hunyuan3d-dit-v2-0) |
| Hunyuan3D-Paint-v2-0 | 纹理生成模型 | 2025-01-21 | 1.3B | [前往](https://huggingface.co/tencent/Hunyuan3D-2/tree/main/hunyuan3d-paint-v2-0) |
| Hunyuan3D-Delight-v2-0 | 图像去光影模型 | 2025-01-21 | 1.3B | [前往](https://huggingface.co/tencent/Hunyuan3D-2/tree/main/hunyuan3d-delight-v2-0) |